Zamjena aktivatora vrata Honda Accord 2008-2012
U ovom članku: Provest ćemo vas kroz korake potrebne za zamjenu neispravnog pokretača vrata na Hondi Accord iz 2008. – 2012.
- Potrebni alati
- Potrebni dijelovi
- 1. korak:Uklanjanje ploče s vrata
- 2. korak:Uklanjanje pokvarenog pokretača vrata
- 3. korak:priprema vašeg novog pokretača vrata
- Korak 4:Ponovna instalacija pokretača i ploče vrata
Težina projekta:Lako
Procijenjeno vrijeme:1,5 sat (ili manje)
Aktivator vozačevih vrata na mojoj Hondi Accord iz 2009. počeo je proizvoditi buku prije otprilike 6 mjeseci prilikom zaključavanja i otključavanja. Osobito je to bilo vidljivo kada su se vrata zatvorila i automobil počeo kotrljati u vožnji – automatsko zaključavanje. Zvučalo je pomalo kao jauk (u nedostatku boljeg izraza).
Konačno, prije otprilike dva tjedna prestao je reagirati na povremeno zaključavanje i otključavanje. Primijetio sam da bi se svaki put kad bih se udaljio od stop svjetla ono pokušalo zaključati - stop svjetlo za stop svjetlom. Shvatio sam da se vrata na vozačevoj strani ne zaključavaju i da ih funkcija automatskog zaključavanja samo pokušava zaključati svaki put kad se auto pokrene. To je bio moj red za zamjenu.
U ovom članku ću vas provesti kroz korake za uklanjanje ploče vrata i zamjenu pokretača vrata vaše Honde. Zapravo je prilično jednostavno. Zapamtite:za dobru praksu i sigurno čuvanje, ne zaboravite odspojiti negativnu stranu akumulatora vašeg vozila prije bilo kakvog električnog rada kako biste spriječili pucanje osigurača ili električno oštećenje vašeg automobila!
Potrebni dijelovi
Zapravo postoji samo jedan dio (ili dva ako radite dvoja vrata):
- Aktuator na strani vozača za Hondu Accord 2008-2012 – 37 USD
- Aktuator na strani suvozača za Hondu Accord 2008-2012 – 32 USD
Potrebni alati
Ovaj je projekt bio prilično jasan i jednostavan i zahtijevao je samo nekoliko alata:
- Phillips odvijač
- Odvijač s ravnom glavom
- 10 mm ključ ili nasadni ključ i čegrtaljka
- Plastični alat za izvlačenje
- Super ljepilo
- Ljepljiva traka
1. korak:Uklanjanje ploče s vrata
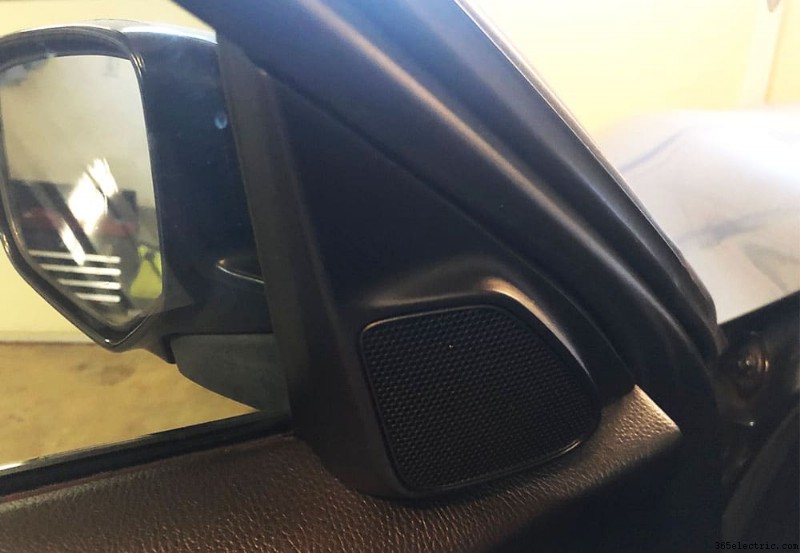
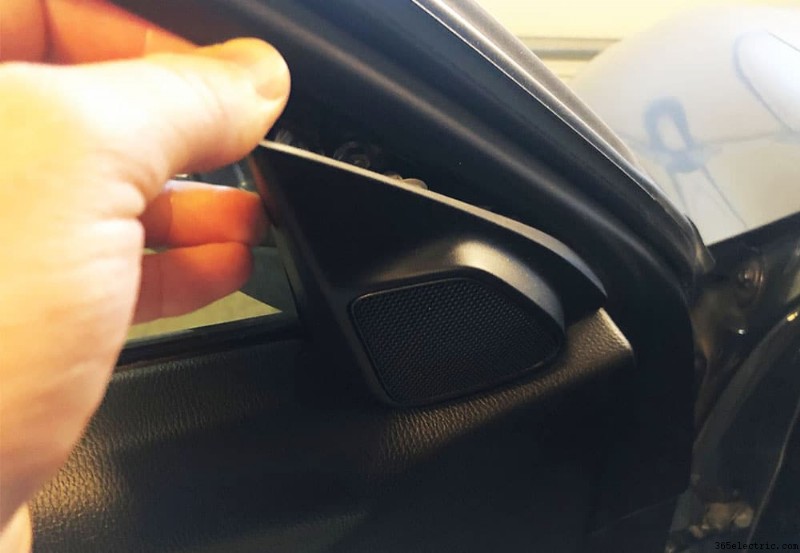
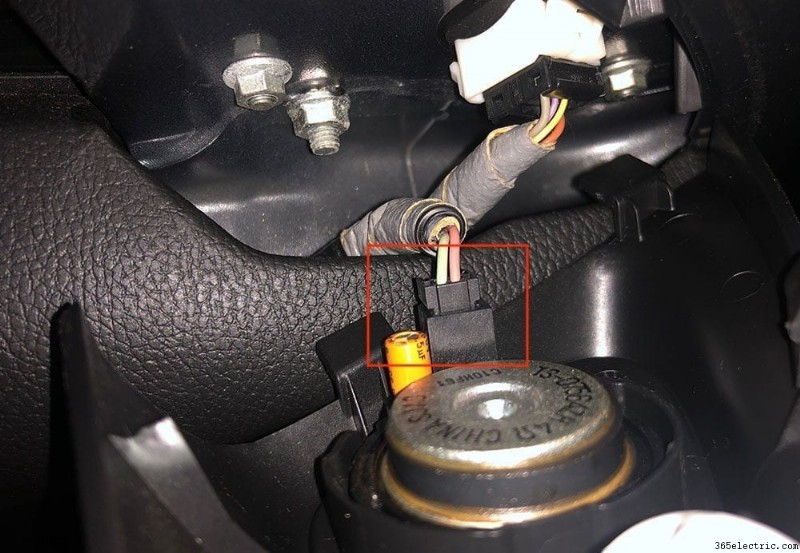
Prvo što trebate učiniti je ukloniti vijke na ploči vrata i otkopčati i ukloniti ploče na vratima vašeg Accorda. Da biste to učinili, počnite s visokotoncem na gornjoj strani vrata. Stavite prste između prozora i ploče visokotonca i nježno povucite. Postoji jedna kopča iza njega tako da će se relativno lako otkopčati. Nakon otkopčavanja uklonite utikač jednog visokotonca i postavite visokotonac sa strane.
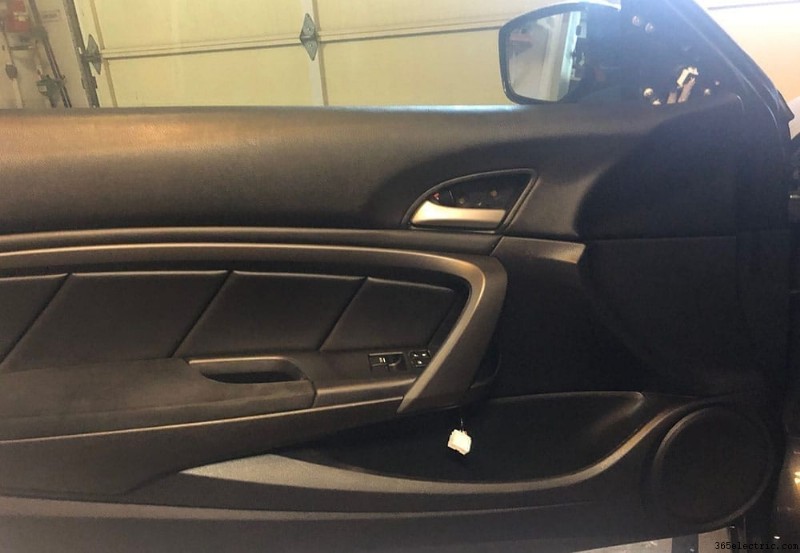
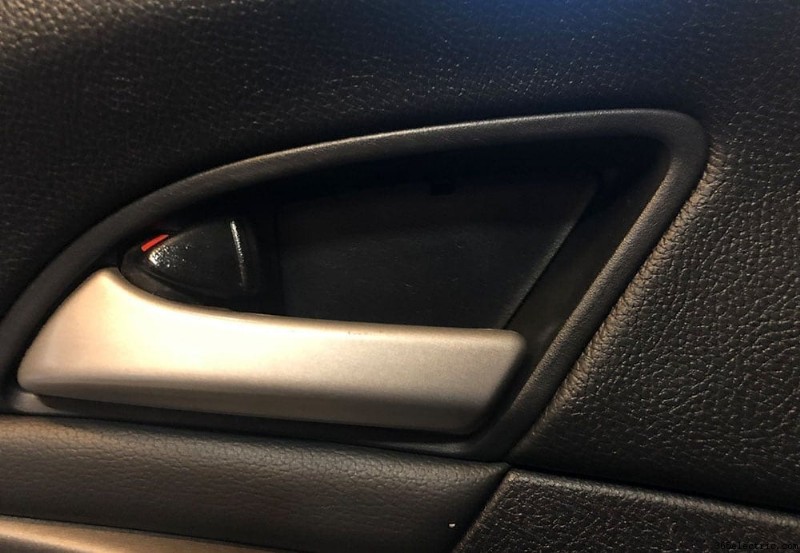
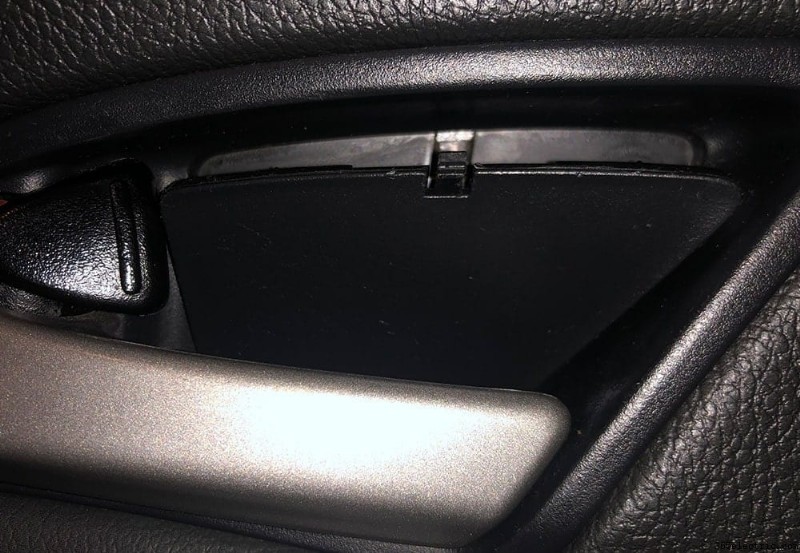
S uklonjenim visokotoncem pomaknite se prema dolje do ručke na vratima. Iza ručke vrata nalazi se ukrasni poklopac koji prekriva tri vijka. Na vrhu plastičnog poklopca primijetit ćete malu kopču. Upotrijebite mali odvijač s ravnom glavom da gurnete kopču i povucite ploču kako biste otkrili tri vijka na vratima. Odvijte sva tri vijka i postavite ih sa strane kada ponovno postavite vrata.
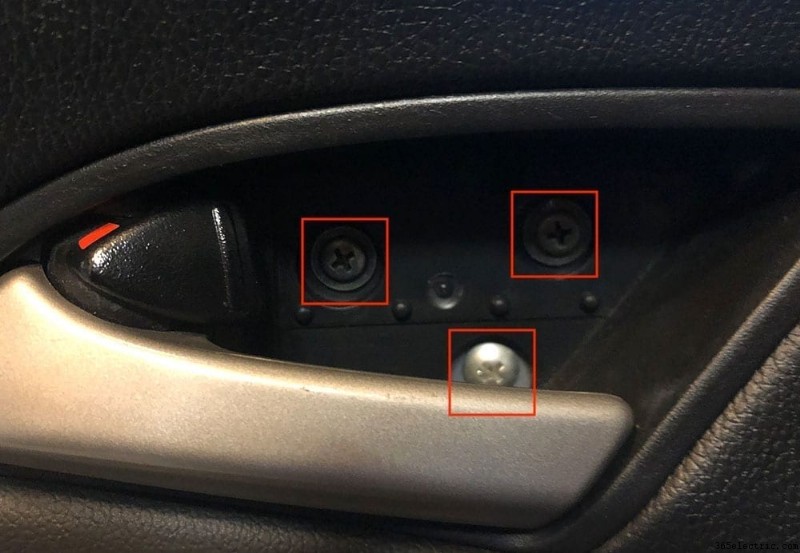
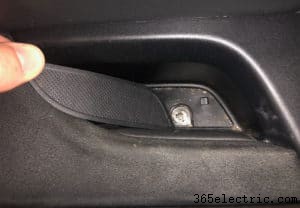
Na naslonu za ruku i ručki, postoji još jedan vijak koji treba ukloniti. Vijak se nalazi ispod poklopca nalik gumi koji se nalazi na dnu područja ručke na vratima. Upotrijebite plosnatu glavu kako biste zaglavili između kutova i podigli poklopac kako biste pristupili vijku ispod. Zatim odvrnite ovaj pojedinačni vijak ploče vrata.
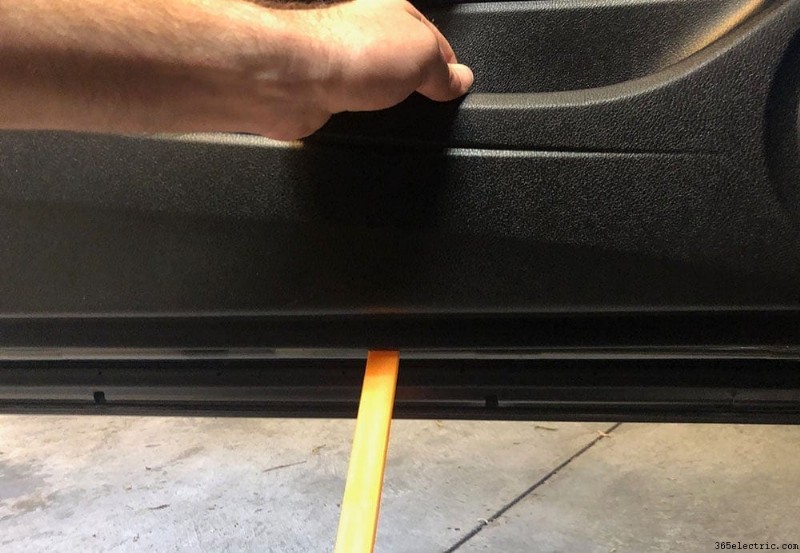
Posljednji vijak koji ćete morati ukloniti nalazi se iza ploče na donjoj strani ručke vrata. Pomoću klinastog alata zadignite ploču prema dolje kako biste uklonili i dobili pristup vijku iza nje. Odvijte završni vijak i ostavite sa strane. Zatim otkopčajte bijele i sive čepove s ploče vrata i gurnite ih iza ploče u vrata. To će omogućiti vašim vratima da se slobodno kreću kada povučete ploču s vrata.
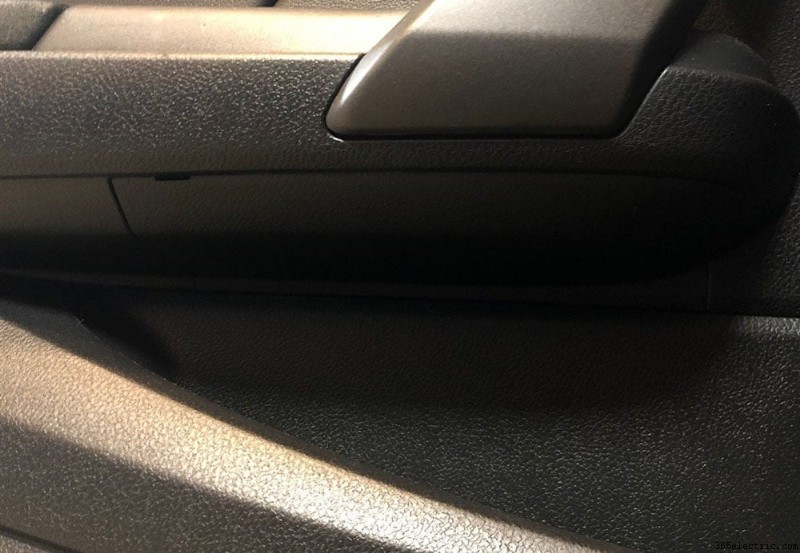
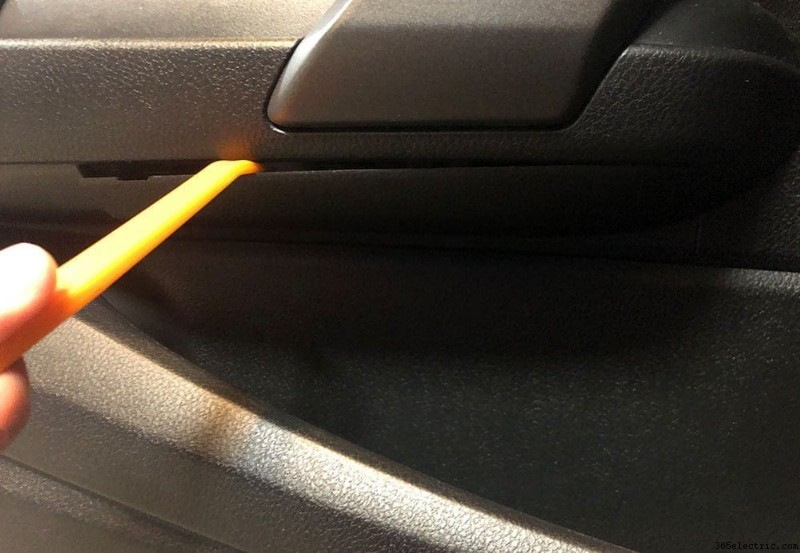
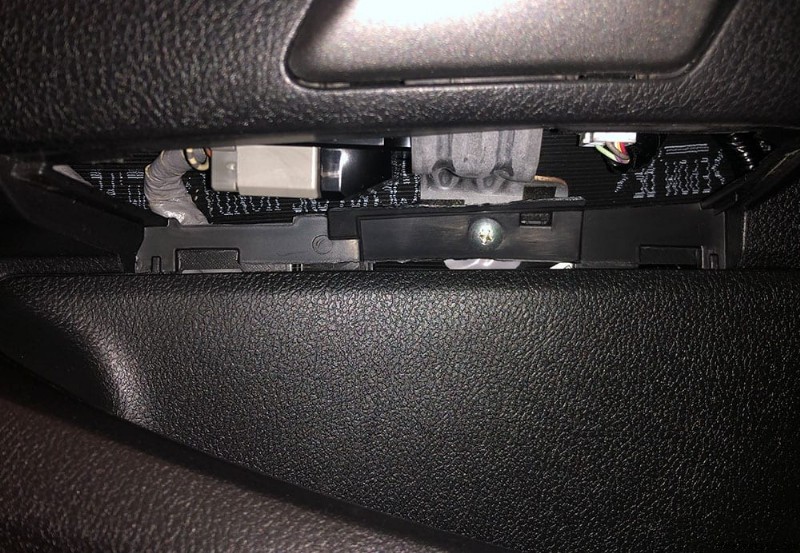
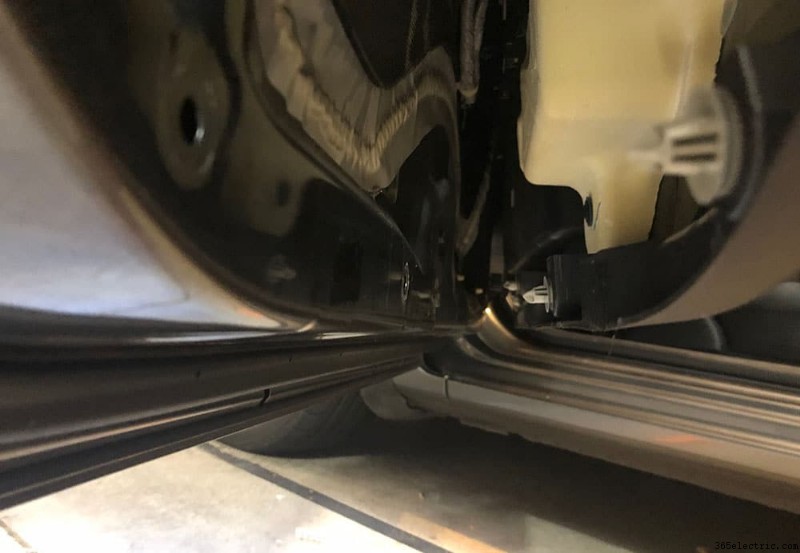
S uklonjenim svim vijcima, visokotoncem i utikačima prekidača spremni ste osloboditi ploču i ukloniti je s vrata. Da biste to učinili, uglavite veliki alat za hvatanje na donju stranu ploče. If you don't have a pry tool large enough there's actually a space that your fingers will fit in along the bottom side of the panel.
Pulling from the very bottom side of the panel and from the cubby area, pull the door panel outwards away from the door to unclip all of the bottom door clips. Typically this will be a loud and abrupt ‘POP' and the bottom side of the panel will break free. There are clips along side the entire bottom of the panel and one or two on the side.
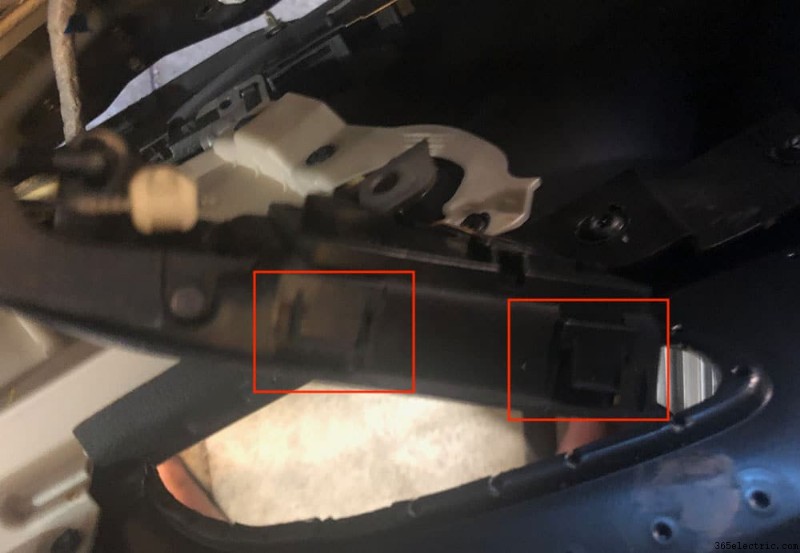
Once all of the clips are free, lift upwards on your door panel to remove it. Once it's lifted away from the door the last piece you'll need to pull free from the panel is the handle. There's a few plastic clips on the back side of the handle that you'll just need to lift upwards to break the handle free and detach it from the door panel.
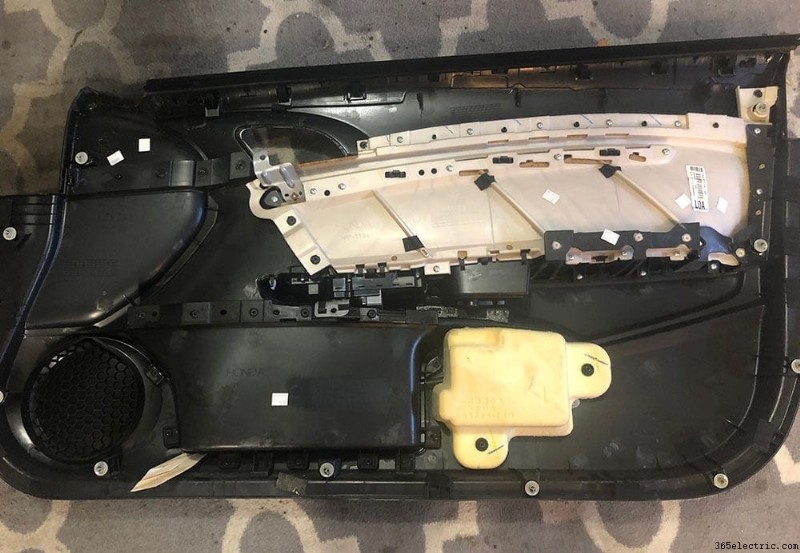
Place it on a rug or towel to prevent any scratching of the surface.
Step 2:Removing Your Broken Door Actuator
With your door panel removed, you now will be able to gain access to the back side of the door and ultimately the actuator. To begin, you'll need to get behind the damping material that covers the opening of the door panel so that you can reach and access the cable and actuator rod. You can do this by running a razor blade along the adhesive that holds the damping material to the door and peel the material back a foot or two – enough to reach the actuator. In my case I cut a sizable slit in the center to try to limit the damage to the damping.
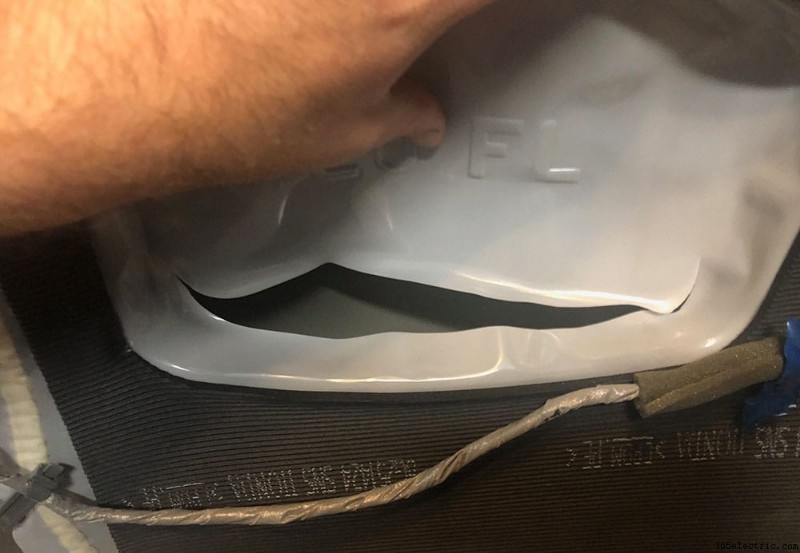
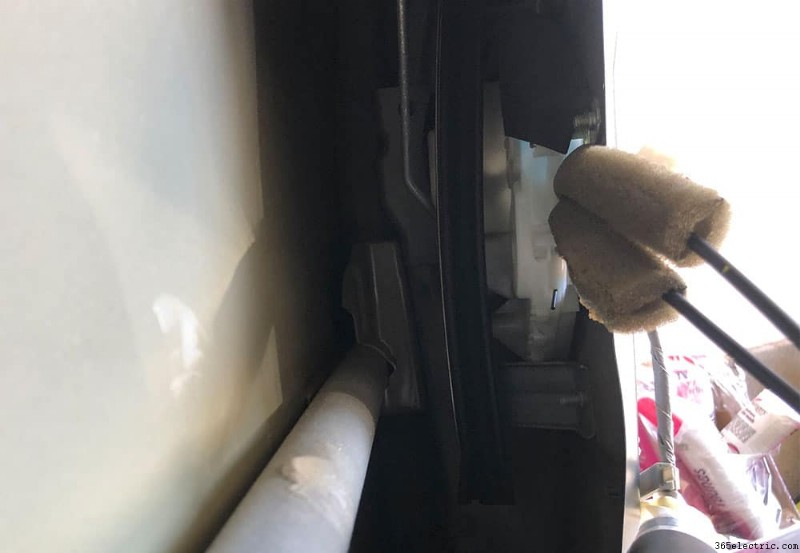
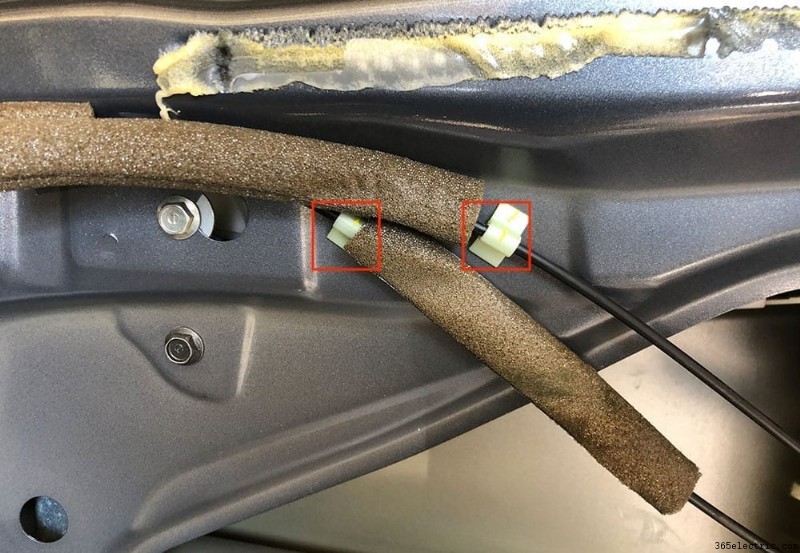
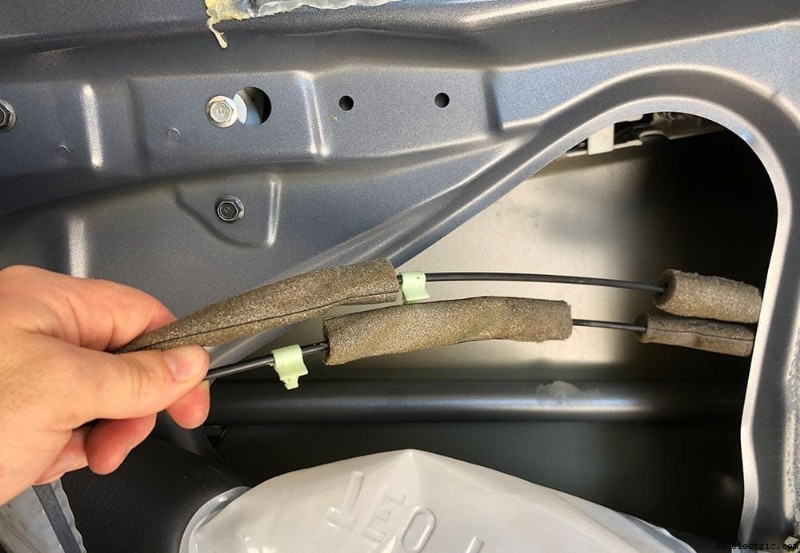
Next, you'll need to unclip the door latch cable that runs along the door and into the back side of the actuator. Once unclipped you can either feed the cables and latch through the damping material or you can leave it hanging for now until you remove the actuator.
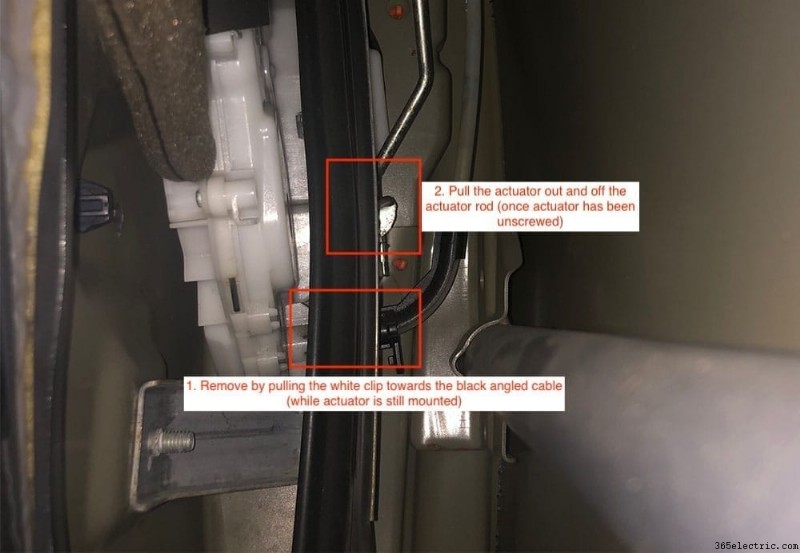
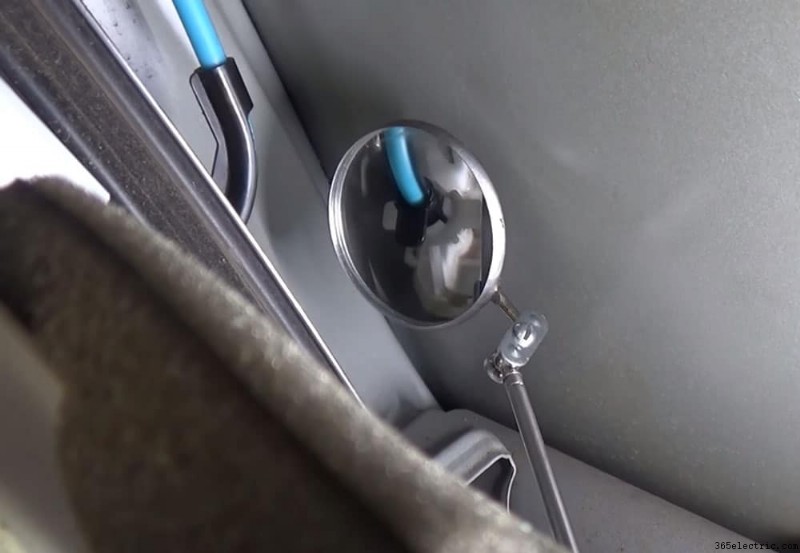
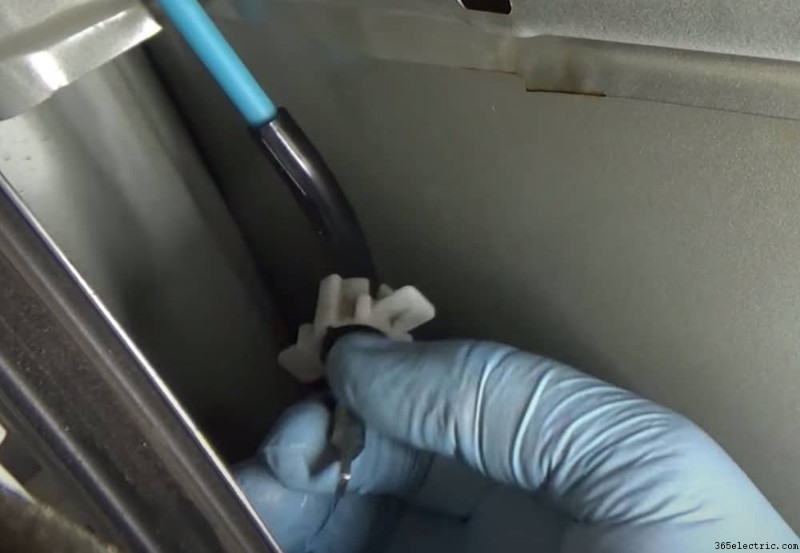
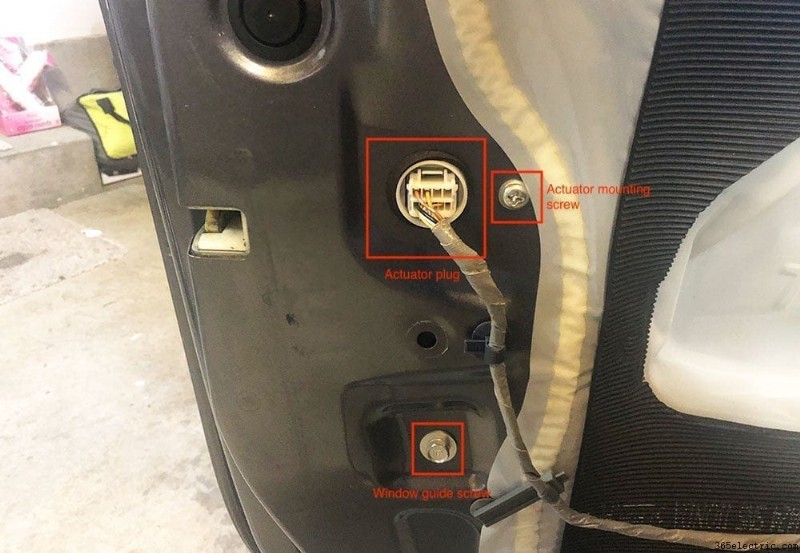
Using the slit in the damping to access the actuator, for those who are replacing the driver side actuator you'll need to remove a single cable that feeds directly into the back side of the actuator (*note this single cable that goes to the back-side of the actuator is only located on the driver side door actuator) . To do this, you need to grasp the white clip that surrounds the black cable housing and pull it away from the actuator to get it to unclip. Once it's unclipped you can remove the cable from the actuator itself (see images). Finally, pull out the plug that powers the actuator.
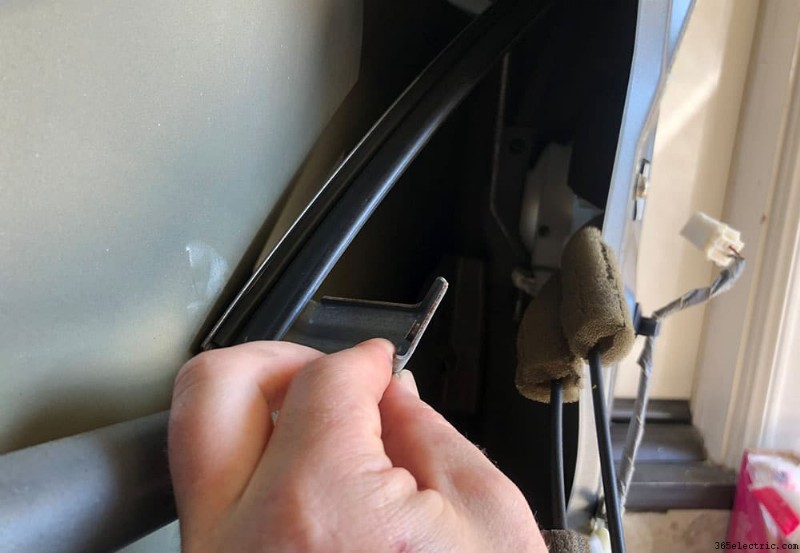
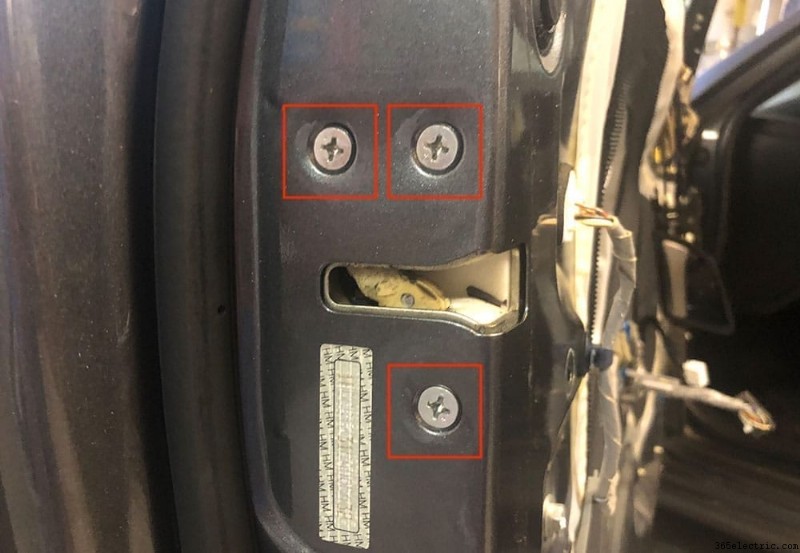
With the cables unhooked from the door and the single cable removed from the back side of the actuator you're ready to unmount the actuator from the door. There are a total of 4 phillips screws that hold the actuator to the door. Remove all 4 screws along with the 10mm bolt that holds the window guide behind the door. This will allow you to pull the actuator from behind the door a little easier with the window guide pushed aside.
Start to pull the actuator from the door, working the remaining rod out. Once the rod is removed you can pull actuator out completely and begin the process of preparing your new actuator.
Step 3:Prepping Your New Door Actuator
There's a couple things you'll need to do to prepare your new door actuator for installation. First, the door handle cables that run to the interior door handle will need to be pulled from the old actuator and installed on the new one. There's a panel that covers the cables with a single phillips screw holding the cover in place. Unscrew the panel to gain access to the two cables.
Remove the two cables from the old actuator and then place it onto the new one along with the cable cover, screwing it back into place.
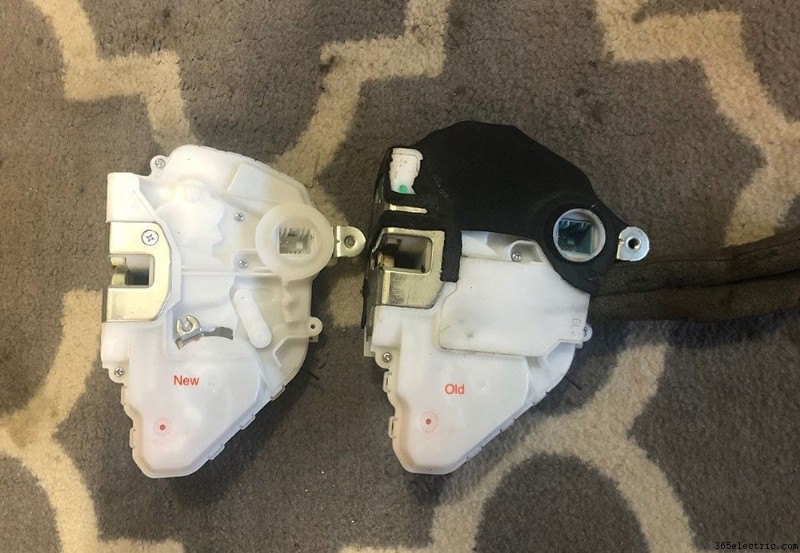
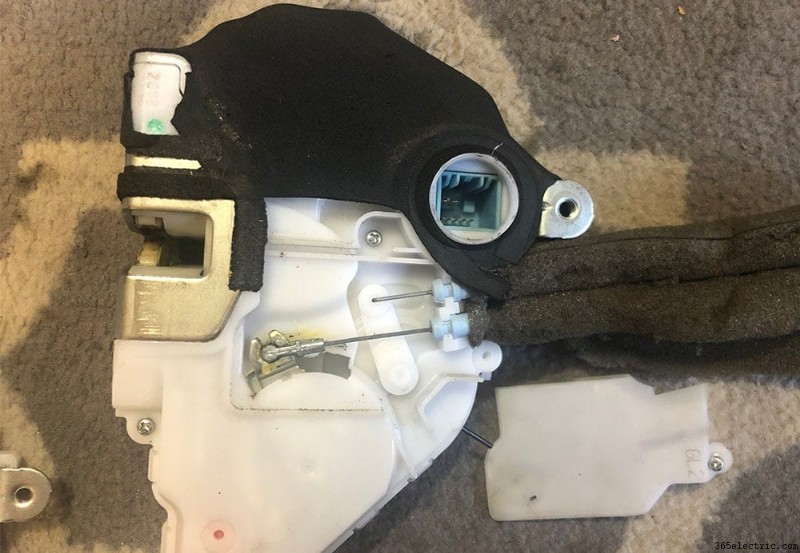
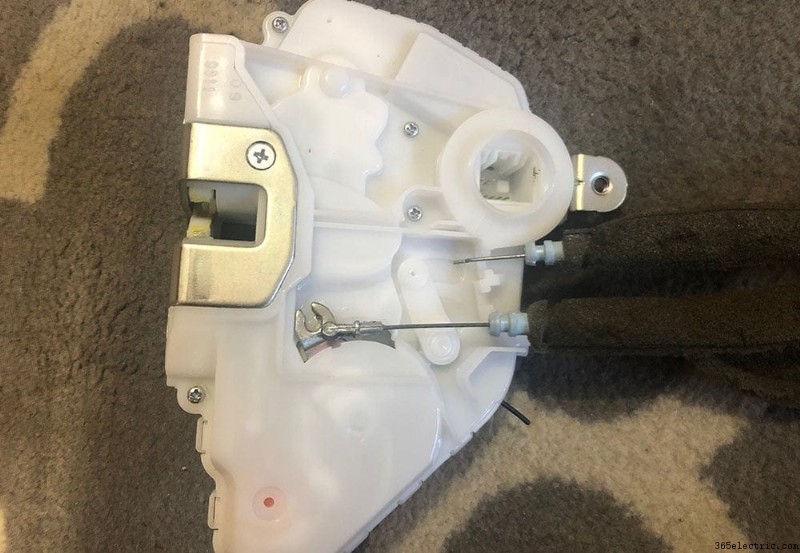
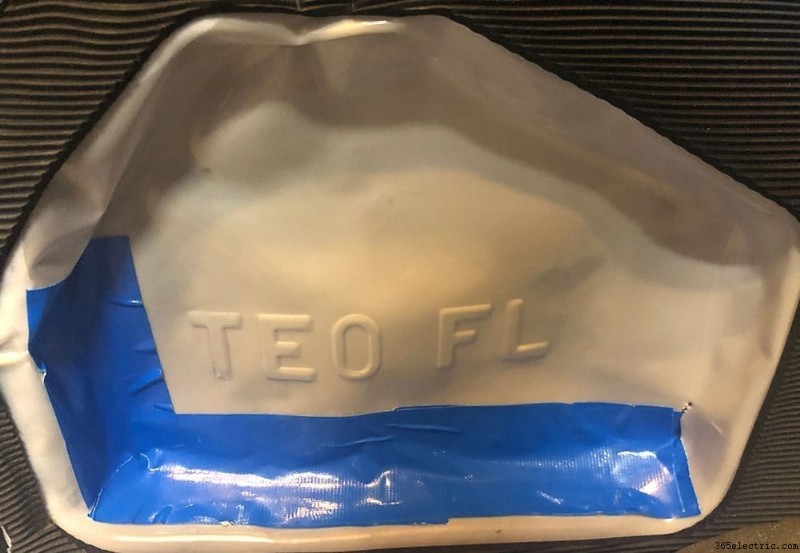
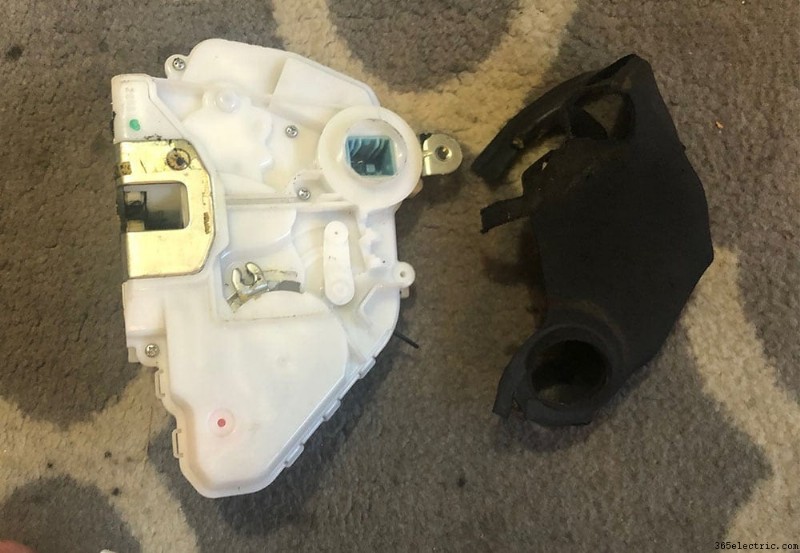
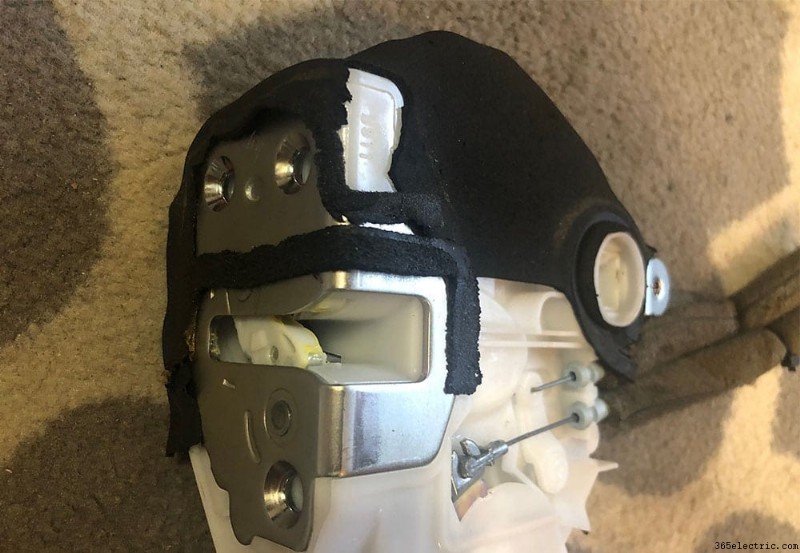
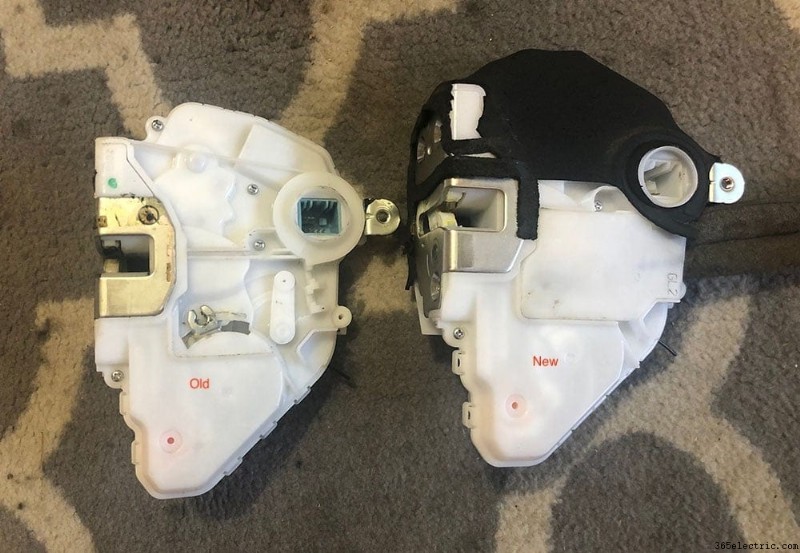
Once the cables are in place on the new actuator, the only thing left to do is to remove the old padding that's on the old actuator and place it onto the new one. Unfortunately, the new actuator doesn't come with the padding so it'll need to be reused from the old, broken unit.
I used a razor blade to separate the padding from the actuator with minimal damage and then used a few dabs of super glue to fuse it to the new one. For the most part, the padding is placed between the door and the actuator so naturally when it's mounted it'll stay in place.
Step 4:Re-installing Your Actuator and Door Panel
The rest of the process is pretty simple. Re-install your actuator, feeding the actuator rod back into the actuator and then mounting it to the door. Plug the actuator plug back in, then insert and re-clip the single cable back into the backside of the actuator.
After the actuator is mounted and the cables are in place, be sure to re-install your window guide and screw it in, along with clipping back the door handle cables to the door.
At this point, you're ready to test your new actuator. Close your door (note that you should ensure the door is unlocked before you close it), and then use your remove to lock and unlock to ensure your new actuator is working properly.
As for the slit that you cut (if you cut one) into the damping, I used some heavy duty duct tape to seal it back up. With the damping fixed you can re-install the door panel, ensuring that the window and door lock buttons are plugged back in. Re-install your tweeter, and you're done!
Hope you enjoyed the how-to, please feel free to leave us a note or ask questions in the comments below!
