Najbolja Safari kamera, objektivi i dodaci za fotografije – plus kako odabrati
Vjerojatno najveća odluka koju ćete morati donijeti prije odlaska na safari je koju opremu za kameru ponijeti sa sobom. Ovo je velika odluka i važno je da je ispravno donesete prije nego što odete.
Kad ste na safariju, vidjet ćete ljude kako fotografiraju na svim uređajima, od svojih pametnih telefona do vrhunske profesionalne opreme s golemim objektivima.
Odabir fotoaparata osobna je odluka u kojoj morate odvagnuti različite čimbenike uključujući proračun, jednostavnost upotrebe, veličinu i vrstu slika koje želite dobiti.
Profesionalni sam fotograf dugi niz godina, a također podučavam fotografiju online. Također sam imao dovoljno sreće provoditi vrijeme na safariju fotografirajući životinje u brojnim zemljama diljem svijeta.
Na temelju svojih iskustava naučio sam mnogo o tome koja je vrsta kamere najbolja za safari i što treba uzeti u obzir pri odabiru kamere za safari.
U ovom postu ću vam reći sve što trebate znati o tome kako odabrati postavku kamere koja je prava za vas i vaš safari. Također ću preporučiti neke fotoaparate i objektive za različite budžete i stilove.
Preporučujem da pročitate ovaj post zajedno s mojim vodičem za dobivanje sjajnih fotografija na safariju, tako da budete potpuno spremni za svoje putovanje.
Što tražiti kod kamere za Safari
Prije nego što preporučim određene kamere i objektive, želio sam podijeliti stvari na koje je važno obratiti pozornost pri odabiru kamere za safari. Ove informacije će vam pomoći da donesete potpuno informiranu odluku, umjesto da samo odaberete nešto s popisa.
Pretpostavit ćemo da tražite novi fotoaparat za svoje putovanje, ali za one koji već posjeduju fotoaparat, ovo vam može pomoći da odlučite hoće li vaša trenutna oprema fotoaparata moći dati fotografije koje želite na svom putovanje.
Cijena
Prije nego uopće počnete razmišljati o tome kakvu kameru želite i značajkama koje ima, morat ćete odlučiti o svom budžetu. To će imati veliki utjecaj na kameru koju na kraju dobijete i važno je od samog početka postaviti realan proračun kako biste zatim mogli pronaći nešto prikladno što odgovara vašem proračunu.
Očito, proračun će se razlikovati za svakoga. Ne zaboravite da vaš proračun ne bi trebao uključivati samo samu kameru. Ako kupujete fotoaparat u kojem možete promijeniti objektiv, tada ćete htjeti uključiti objektiv u kupnju, a oni mogu biti jednako skupi kao i kućište fotoaparata.
Osim toga, vjerojatno će vam trebati dodaci kao što su torba za fotoaparat, remen za fotoaparat, memorijska kartica i rezervne baterije.
Općenito, sljedeće procjene cijena u USD trebale bi vam dati ideju o tome što možete dobiti za svoj novac:
- 200 – 800 USD – početni fotoaparat koji će vam pomoći da zabilježite sjajne uspomene na svoje putovanje
- 800 USD – 2500 USD – kamera srednje klase koja će moći snimiti sjajne fotografije u većini situacija
- $2500+ – krećete se sada prema vrhunskom području, kada počnete trošiti više od ovog iznosa, gledate više profesionalno orijentirane kamere koje će snimiti nevjerojatne slike u širokom rasponu svjetlosnih uvjeta ako odvojite vrijeme da naučite kako pravilno ih koristiti.
Kao što vidite, postoji širok raspon cijena i lako možete potrošiti mnogo novca na opremu za kameru. Međutim, također možete potrošiti manje, a svejedno postići sjajne rezultate.
Vrsta kamere za Safari
Nakon što odredite proračun, morate odlučiti koju vrstu fotoaparata želite ponijeti sa sobom na safari.
Imate četiri glavne opcije za odabir kamere za safari. To su pametni telefon, kompaktni fotoaparat, premosni fotoaparat ili fotoaparat s izmjenjivim objektivom (DSLR ili bez zrcala).
Svaka od ovih opcija ima prednosti i nedostatke, a sada ću brzo proći kroz svaku opciju.
- Pametni telefon . Pametni telefon je dobra opcija ako stvarno ne želite nositi dodatnu opremu i rado imate samo neke slike za uspomenu na putovanje. Općenito su jednostavni za korištenje, a najnoviji modeli uključuju određenu razinu optičkog zuma. Međutim, teško ćete snimiti sjajne snimke divljih životinja udaljenih više od nekoliko metara, a slike snimljene pri smanjenoj svjetlosti vjerojatno će biti prilično zrnate.
- Kompaktni fotoaparat . Kompaktna kamera dobar je kompromis između pametnog telefona i veće opreme. Vrlo su prenosivi, ali još uvijek su dostupni modeli s dobrim optičkim zumom. Također su jednostavni za korištenje, pa se često nazivaju i usmjeri i snimaj kamerama. Međutim, neki modeli uključuju više ručnih načina rada i napredne značajke za one koji žele više kontrole. Glavni nedostaci su smanjena kvaliteta slike u usporedbi s većim postavkama i ne rade tako dobro pri slabom osvjetljenju.
- Kamera na mostu . Jedna od popularnijih opcija za safari je kamera na mostu, ponekad poznata i kao superzoom kamera. Bridge kamere su veće od kompaktnih kamera i obično imaju velike zum objektive koji mogu uhvatiti udaljene subjekte. Kao i kod kompaktnih fotoaparata, ne možete promijeniti objektiv kao na bezrcalnom ili DSLR-u. Obično nude dobru ravnotežu između kvalitete slike, zumiranja, upotrebljivosti i pristupačnosti.
- DSLR / fotoaparat bez ogledala . Ako želite najbolje rezultate u pogledu kvalitete slike, onda je DSLR ili fotoaparat bez zrcala prava opcija. Imaju veće senzore pa mogu uhvatiti više svjetla nego druge vrste kamera, što znači da dobivate bolje rezultate u uvjetima slabijeg osvjetljenja. Ovi fotoaparati vam također omogućuju promjenu objektiva, tako da možete odabrati objektiv ili objektive koji odgovaraju vašem proračunu i potrebama. Također imaju mnogo više ručnih kontrola od ostalih opcija na popisu, tako da imate veću kontrolu nad izgledom vaših slika. Loša strana je što su veći i teži, potrebno im je više vremena da se istinski svladaju i obično su skuplji.
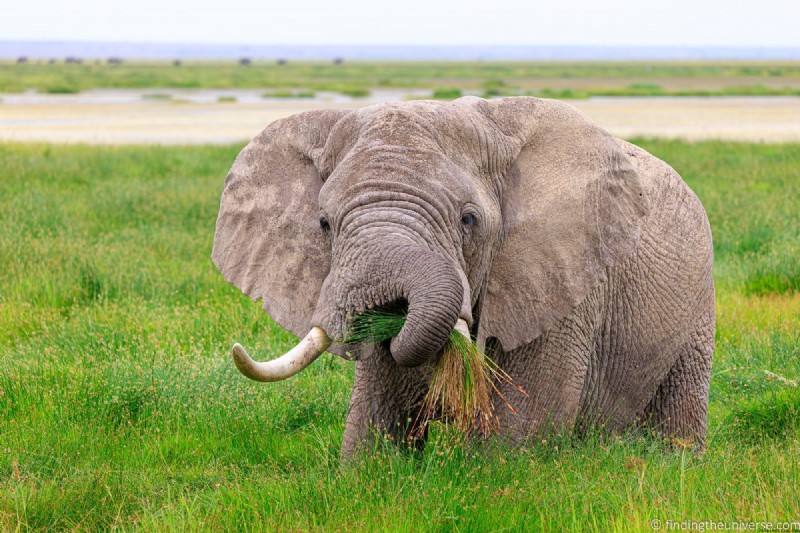
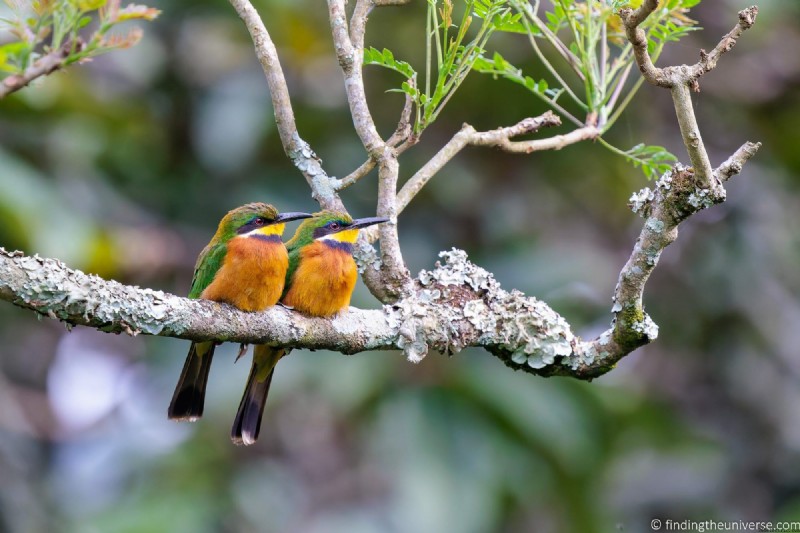
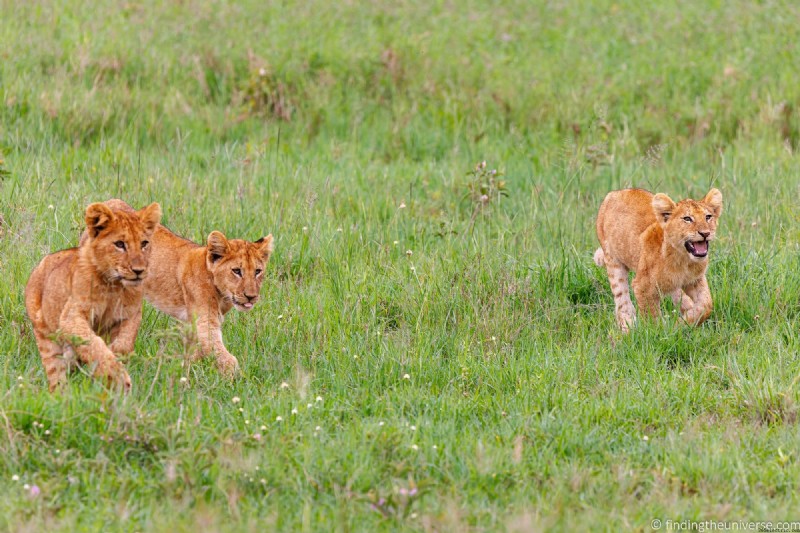
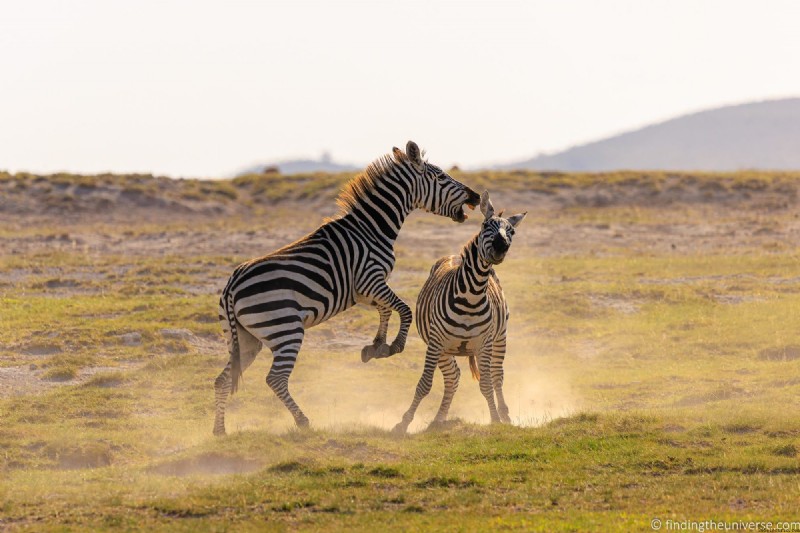
Ne postoji točan odgovor od navedenog. Vaša će odluka ovisiti o vašem proračunu, veličini fotoaparata koji želite nositi i koliko vremena želite potrošiti na učenje kako ga koristiti. Ispod su različite slike s brojnih različitih kamera koje vam pokazuju što je moguće.
Veličina senzora za Safari kameru
Senzor je jedna od najvažnijih komponenti unutar vašeg fotoaparata. Senzor je digitalni ekvivalent komadića filma. To je ono što bilježi svjetlost i sprema je kao digitalnu datoteku.
Za razliku od role filma, koja se isporučuje u fiksnoj veličini za većinu fotoaparata, digitalni senzor može biti velik ili malen koliko proizvođač želi. Manji senzori nalaze se u manjim fotoaparatima poput pametnih telefona i kompaktnih fotoaparata, dok se veći senzori nalaze u fotoaparatima bez ogledala i DSLR fotoaparatima.
Veličina senzora utječe na nekoliko stvari. Prvo, to utječe na stvarnu veličinu kamere i objektiva. Veći senzor treba veće tijelo kamere za smještaj i veću leću za hvatanje svjetla. Manji senzor će stati u manje kućište fotoaparata.
Veći senzori također mogu uhvatiti više svjetla, otprilike na isti način na koji ako ostavite veliku kantu vani za vrijeme kišne oluje, ona će uhvatiti više vode nego mala kanta u istom vremenskom razdoblju.
To znači da će veći senzor normalno raditi bolje kada je dostupno manje svjetla i proizvodit će slike s manje šuma. Također možete koristiti veće brzine zatvarača.
Veći senzori su međutim skuplji za proizvodnju i kao rezultat toga obično se nalaze u vrhunskim i skupljim fotoaparatima.
Uobičajene veličine senzora na koje ćete naići navedene su u nastavku redoslijedom veličine od manjih prema većim. Međutim, trebali biste biti svjesni da postoji mnogo varijacija, posebno na iznimno konkurentnom tržištu pametnih telefona.
- 1/2,5 inča – 5,76 mm x 4,29 mm (25 mm²). Nalazi se u pametnim telefonima, kao iu nekim kompaktnim fotoaparatima i kamerama za most. Veličine senzora oko ove točke malo variraju, ali ovo je oko prosjeka.
- Senzor od 1 inča – 13,2 x 8,8 mm (116 mm²) nalazi se u vrhunskim kompaktnim fotoaparatima i vrhunskim premosnim kamerama. Naziv 1″ je marketinški izraz koji nema nikakve veze s veličinom senzora.
- Mikro četiri trećine – 17,3 mm x 13 mm (225 mm²) nalazi se u "mikro četiri trećine" fotoaparatima Olympusa i Panasonica.
- APS-C Canon – 22,4 mm x 14,8 mm (329 mm²) koji se nalazi u većini potrošački orijentiranih Canon DSLR fotoaparata i fotoaparata bez ogledala
- APS-C Nikon, Sony, Pentax – 23,6 mm x 15,7 mm (370 mm²) nalazi se u većini potrošački orijentiranih DSLR fotoaparata i fotoaparata bez ogledala drugih proizvođača kao što su Nikon, Sony, Pentax, Fuji itd. Nikon to naziva DX senzori.
- Puni okvir – 36 mm x 24 mm (864 mm²). Nalazi se u vrhunskim profesionalnim DSLR fotoaparatima i fotoaparatima bez zrcala tvrtki Sony, Canon, Nikon itd. Naziva se tako jer je otprilike iste veličine kao komad filma od 35 mm.
Važna stvar za usporedbu je površina u kvadratnim milimetrima. Ovo pokazuje usporednu veličinu svakog senzora. Senzor punog kadra, na primjer, ima više nego dvostruko veću površinu od senzora APS-C i preko 30 puta veću od površine senzora pametnog telefona ili kompaktnog fotoaparata.
To dovodi do velikih razlika u izvedbi u stvarnom svijetu.
Općenito, što je senzor veći, to ćete moći dobiti bolje fotografije. To će biti najočitije u situacijama slabijeg osvjetljenja.
U idealnom slučaju, za najbolje fotografije, trebali biste APS-C ili full frame senzor za safari jer će to prikupiti najviše svjetla i biti korisno u više situacija. Međutim, kompromis je u tome što su te kamere obično skuplje i veće. Stoga bih preporučio da nabavite najveći senzor koji odgovara vašem proračunu i željenoj veličini fotoaparata.
Žarišna duljina/optički zum za Safari
Stvarno važna specifikacija o kojoj treba razmišljati kada birate fotoaparat ili objektiv za safari je žarišna duljina objektiva. Ovo se također često naziva "zumiranje". Žarišna duljina posebno je važna ako želite fotografirati ptice, manje životinje i udaljenije divlje životinje.
Veći zum objektiv omogućit će vam dobivanje jasnijih slika udaljenijih kao i manjih divljih životinja poput ptica ili malih životinja.
Kada je riječ o zumiranju, često ćete vidjeti pojmove optički zum i digitalni zum. Ključna specifikacija je optički zum.
Digitalno zumiranje zapravo je isto što i obrezivanje slike nakon što ste je snimili, stoga nema stvarne koristi jer to možete učiniti sami pomoću aplikacije za uređivanje.
Optičko zumiranje uključuje pomicanje optičkih elemenata u fotoaparatu kako bi se zapravo povećala slika.
Kada je riječ o odabiru količine zuma za safari, ako birate kameru koja ima ugrađenu leću poput kompaktne kamere ili bridge kamere, tada biste željeli najmanje 10x optički zoom. Ali idealno bih preporučio optički zum od 16x ili veći.
Ako ste na tržištu za jednu od ovih kamera, zapamtite da je broj optičkog zooma samo marketinški broj. Odnosi se na temeljnu žarišnu duljinu, što je točniji način usporedbe povećanja između leća. Dopustite mi da to brzo objasnim radi jasnoće jer može biti zbunjujuće.
Sve leće imaju ono što je poznato kao žarišna duljina, koja se mjeri u milimetrima (mm). Ako je broj u mm mali, recimo 20 mm, onda je to širokokutni objektiv, pa će dobiti puno scene u kadru. Ako je broj veći od 50 mm, onda je to teleobjektiv, što znači da povećava sliku.
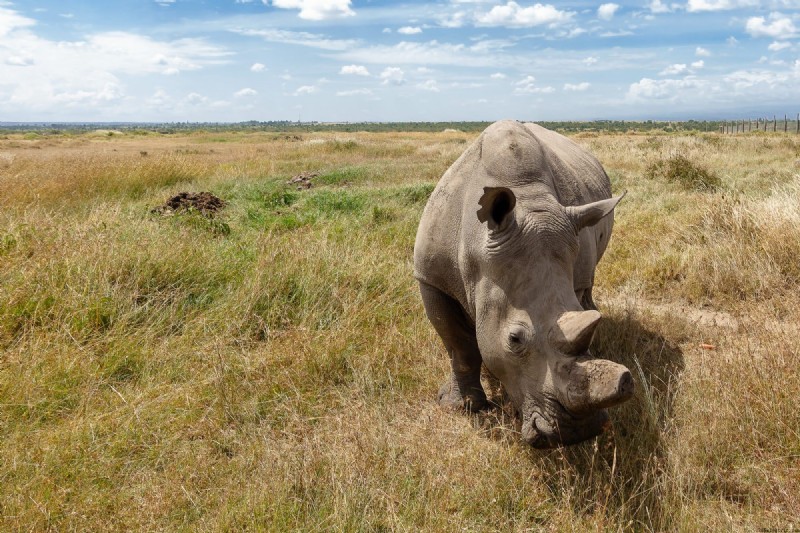
Evo nekoliko primjera iste scene na dvije različite žarišne duljine kako biste mogli vidjeti razliku. Ovo su neobrezane slike.
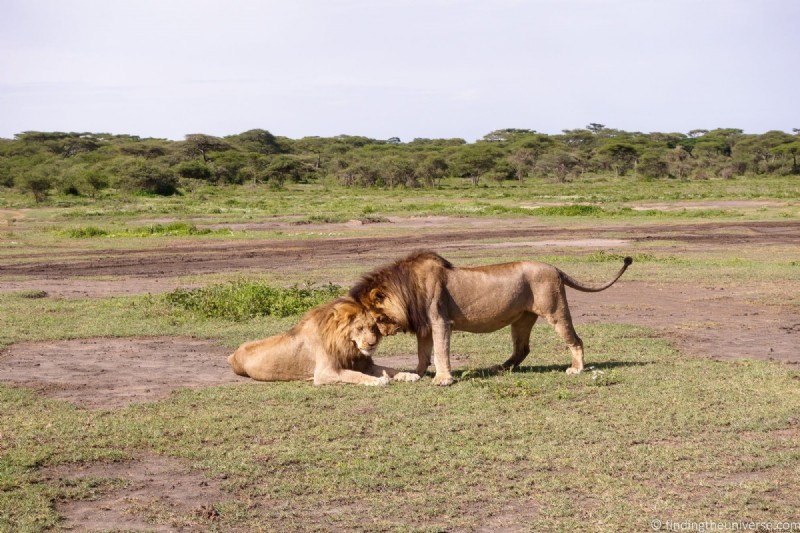
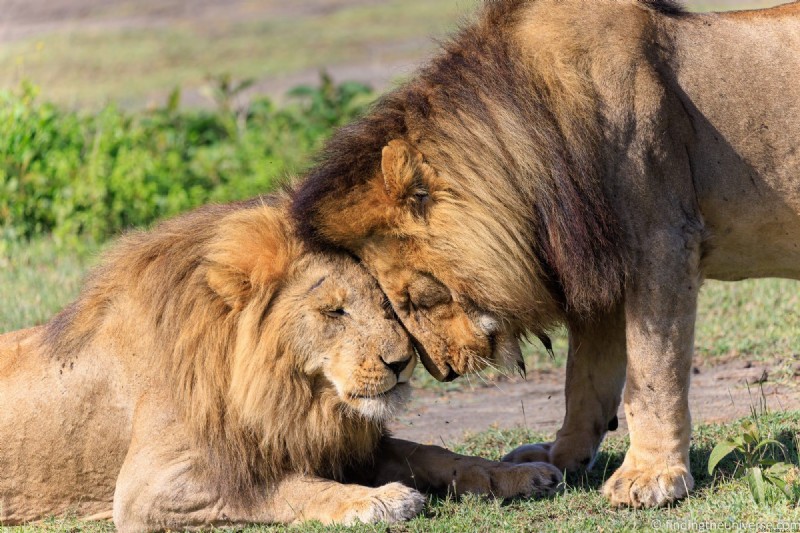
Kao što možete vidjeti na gornjim slikama, žarišna duljina od 400 mm očito vam omogućuje da se mnogo više približite subjektu. Mogli biste skratiti gornju snimku na sličan rezultat, ali bi zbog toga bila mnogo manje oštra i više zrnata.
Kada kamera ima zum objektiv, to znači da možete promijeniti žarišnu duljinu kako bi slika izgledala veća (zumiranje) ili manja (zumiranje). Broj optičkog zuma odnosi se na razliku između najmanjeg i najvećeg broja žarišne duljine.
Na primjer, ako imate kameru poput Sony RX10 IV, ona ima žarišnu duljinu ekvivalentnu 24 mm – 600 mm. 600 podijeljeno s 24 je 24, tako da ovaj fotoaparat ima optički zum od 24x.
Ako ste imali DSLR ili fotoaparat bez zrcala s objektivom od 150 mm – 600 mm, to je tehnički samo 4x optički zoom jer je 600 podijeljeno sa 150 4x. Međutim, i Sony i DSLR fotoaparat dali bi isti rezultat u pogledu kadriranja kada bi se zumirali do kraja.
Razlika je u tome što vam Sony također omogućuje snimanje širokokutnih fotografija. Međutim, ako usporedite broj 4x s brojem 16x, Sony zvuči mnogo impresivnije! Zbog toga je važno razumjeti temeljne brojke kako biste mogli preskočiti marketing.
Općenito, za fotografiranje divljih životinja na safariju trebate fotoaparat s lećom koja će vam omogućiti zumiranje između 70 mm i 400 mm. Ovaj će raspon dobro funkcionirati za većinu scenarija fotografiranja divljih životinja, a posebno na safariju jer inače ne možete izaći iz vozila ili napustiti cestu, pa ste ograničeni time koliko blizu možete prići životinjama.
Sada postoje i ultra-telefoto ili superzoom objektivi koji počinju od 400 mm i mogu ići do 1200 mm. Ovi će objektivi biti preveliki i preskupi za većinu ljudi, ali bi mogli biti zanimljivi revnim fotografima divljih životinja s velikim budžetom, posebno onima koje zanima fotografija ptica.
Iako će vaš glavni fokus vjerojatno biti fotografiranje životinja i ptica dok ste na safariju, velike su šanse da ćete također željeti fotoaparat koji možete koristiti i za fotografiranje krajolika, zgrada, hrane, ljudi itd.
Stoga biste možda željeli kameru koja također može snimati širokokutne snimke (oko 20 mm). To može biti višenamjenski zum objektiv na vašem postojećem fotoaparatu, zasebni širokokutni objektiv ili biste mogli razmisliti o korištenju druge kamere kao što je vaš pametni telefon za širokokutne snimke.
Otvor blende za Safari
Kao i žarišna duljina, svaki objektiv ima specifikaciju poznatu kao otvor blende. Otvor blende je rupa unutar leće kroz koju prolazi svjetlost. Pomalo je poput zjenice u vašem oku.
Poput zjenice u vašem oku, otvor blende može se povećavati i smanjivati kako bi propustio više ili manje svjetla.
Svaki objektiv ima otvor blende, a glavna specifikacija na koju treba obratiti pozornost je koliki će biti otvor blende. Otvor blende se mjeri u f/stopovima, pri čemu manji broj znači da je rupa veća.
Na primjer, objektiv s otvorom blende f/2,8 ima veću rupu nego objektiv s otvorom blende f/5,6.
Općenito, što je veći otvor to je poželjniji. Veći otvor blende propušta više svjetla, što znači da možete koristiti veću brzinu zatvarača ili niži ISO, a oboje može biti od koristi.
Kada gledate kamere ili leće, možete primijetiti da je otvor blende prikazan kao raspon, na primjer f/3,5 – 5,6. To znači da se maksimalni otvor blende mijenja kako mijenjate žarišnu duljinu. U najširem kutu maksimalni otvor blende bit će f/3,5. Pri punom zumiranju bit će f/5,6.
To je osobito uobičajeno kod kompaktnih fotoaparata i fotoaparata s mostom s vrlo velikim objektivima za zumiranje, kao i kod jeftinijih objektiva. To znači da što više povećavate, manje će svjetla padati na senzor, pa ćete morati upotrijebiti veću brzinu zatvarača ili višu ISO vrijednost za kompenzaciju.
Skuplji vrhunski samostalni objektivi za DSLR fotoaparate i fotoaparate bez ogledala mogu imati fiksni otvor blende kroz cijelu žarišnu duljinu. To su također obično najveće i najteže leće.
Za safari, što je veći otvor blende (i manji f/stop broj), to bolje, iako ćete to, naravno, morati proračunati prema težini i cijeni. U idealnom svijetu, željeli biste objektiv s maksimalnim otvorom blende od f/2,8 ili f/4 za safari, ali to nije uvijek praktično kada se u obzir uzmu cijena i težina.
Lakoća korištenja i krivulja učenja
Kamere nisu jednako stvorene kada je u pitanju jednostavnost upotrebe. Na primjer, kamera pametnog telefona obično je vrlo jednostavna za korištenje, tako da pritisnete gumb i ona snimi fotografiju. Također dolaze s mnogo pametne tehnologije, poznate kao računalna fotografija, koja pokušava dobiti najbolje rezultate za svaku sliku koju snimite. Ovo je vjerojatno i uređaj s kojim ste dobro upoznati i koji redovito koristite.
Međutim, druge vrste fotoaparata imat će strmiju krivulju učenja, posebice fotoaparati bez ogledala i DSLR fotoaparati. Naravno, fotoaparat bez zrcala ili DSLR također će imati automatski način rada koji radi na isti način kao i kompaktni fotoaparat ili pametni telefon, na način da možete pritisnuti gumb i snimiti fotografiju, iako im obično nedostaje element računalne fotografije.
Zbog toga slike s fotoaparata pametnog telefona mogu izgledati bolje od snimaka bez ogledala ili DSLR-a, osobito kada ih snimi korisnik početnik.
Dobra vijest je da možete postići nevjerojatne rezultate s vrhunskim fotoaparatom ako odvojite vrijeme da naučite što sve tipke i kotačići zapravo rade, jer ćete tada moći natjerati fotoaparat da radi ono što vi želite. . Ali to zahtijeva ulaganje vremena i prakse.
Odluka koju morate donijeti je koliko vremena želite potrošiti na učenje korištenja fotoaparata. Ako biste doista radije više usmjerili i snimali iskustvo, onda je pametni telefon, kompaktni fotoaparat ili kamera za most vjerojatno najbolja opcija. Naravno, i dalje ćete dobivati bolje rezultate ako naučite njegove razne značajke, ali bi i dalje trebao dobivati dobre rezultate sa svojim postavkama izvan kutije.
S druge strane, ako želite provesti neko vrijeme stvarno učeći kako vaš fotoaparat radi, onda je DSLR ili fotoaparat bez ogledala dobra opcija. To će imati širok raspon načina snimanja, uključujući potpuno ručne opcije, dajući vam potpunu kontrolu nad krajnjim rezultatom.
Ako planirate nabaviti novi fotoaparat i želite pomoć u korištenju i poboljšanju svoje fotografije, postoji mnogo knjiga, radionica i tečajeva. Na primjer, vodim online tečaj fotografije za putovanja koji je osmišljen kako bi svima pomogao da poboljšaju svoju fotografiju.
Broj megapiksela
Svaki senzor kamere ima broj megapiksela, obično u rasponu od 12 MP do 50 MP+.
Što je veći broj, senzor kamere će zabilježiti više piksela prilikom spremanja vaše slike. Megapiksel samo znači 1 milijun piksela, a odnosio bi se na sliku širine 1000 piksela i visine 1000 piksela. 1000 puta 1000 je milijun, dakle megapiksel.
Više megapiksela znači da će konačna slika biti veća u smislu širine i visine slike. Prednost ovoga je što vam može omogućiti više izrezivanja slika bez gubitka detalja.
Nedostatak je što su slikovne datoteke veće, a slike s većim megapikselom mogu biti malo zrnatije.
Ne bih se previše brinuo o broju megapiksela osim ako ne planirate fotografirati puno manjih subjekata poput ptica s veće udaljenosti ili planirate ispisati puno svojih slika u većoj veličini. U tim slučajevima veliki broj megapiksela (30 MP+) omogućit će vam da više izrežete snimku i još uvijek dobijete dobar rezultat.
Inače, za pametne telefone je dobro sve preko 12MP, a za ostale kamere sve preko 20MP će biti dovoljno za safari. Također se možete izvući s manjim brojem megapiksela ako fotoaparat ima jako veliki zum, jer to negira potrebu za obrezivanjem nakon snimke.
Stabilizacija slike
Kada snimate fotografije i držite fotoaparat u ruci, svaki pokret vaše ruke može se pretvoriti u zamućenje u pokretu na vašim slikama. To će rezultirati slikama koje nisu oštre.
To utječe na slike snimljene sa sporijim brzinama zatvarača, primjerice kada snimate pri slabom osvjetljenju. Također je očiglednije pri korištenju dužih zumiranja, što može pretjerati u pokretima ruke. To je slično učinku koji dobivate kada gledate kroz dalekozor ili teleskop – čak i mali pokreti uzrokuju da je slika mutna za gledanje.
Kamere sa stabilizacijom slike mogu to kompenzirati do određene točke, što znači da će vaše slike biti oštrije. Stabilizacija slike može biti ugrađena ili u tijelo fotoaparata ili u objektiv (ili oboje), a ja bih predložio odabir i kućišta fotoaparata i objektiva sa stabilizacijom slike za najbolje rezultate.
Samo imajte na umu da stabilizacija slike može učiniti samo toliko, nije popravak samo za oštrinu slike! Stoga svakako pokušajte što bolje stabilizirati svoj fotoaparat prije snimanja fotografija i koristite odgovarajuću brzinu zatvarača za žarišnu duljinu na kojoj snimate.
Brtvljenje od vremenskih uvjeta
Safari može biti vrlo prašnjavo mjesto, a kamere obično ne vole previše prašinu. Ako idete u tropski dio svijeta ili posjećujete zemlju tijekom kišne sezone, također ćete vjerojatno naići na kišu i vlagu. Neke kamere na tržištu, osobito skuplji modeli, nude zaštitu od vremenskih uvjeta.
Kamera zaštićena od vremenskih uvjeta obično ima različite značajke za sprječavanje prodora vlage u kameru, kao što je gumena zaštita na nosačima objektiva i utorima za memorijske kartice. To pomaže u sprječavanju ulaska vode u fotoaparat tijekom kiše, ali također pomaže u sprječavanju ulaska prašine u fotoaparat.
Prašina unutar fotoaparata može imati niz negativnih učinaka, od stvaranja neprikladnih mrlja na vašim slikama ako padne na senzor, do uzroka da uopće ne radi.
Ako imate kameru koja nudi određenu razinu otpornosti na vremenske uvjete, to može zaštititi i od vode i od prašine, što znači da imate jednu stvar manje o kojoj morate brinuti. Idealno bi bilo da za safari fotografiju želite kameru s vremenskim uvjetima, iako to nije značajka koja je dostupna na svim kamerama.
Sustav automatskog fokusiranja
Snimanje fotografija divljih životinja u pokretu može biti izazovno, osobito kada je u pitanju postizanje i zadržavanje fokusa. Ključno je nabaviti kameru koja ima dobar sustav autofokusa.
Moderni sustavi autofokusa mogu automatski identificirati i pratiti stvari kao što su životinje i njihove oči, tako da sve o čemu morate brinuti je zadržati subjekt u kadru.
Kada gledate fotoaparat za safari fotografiju, provjerite koje značajke ima sustav autofokusa. Posebno tražite koliko brzo može fokusirati (brže je bolje) i nudi li bilo kakvu vrstu detekcije subjekta ili praćenja oka. To će puno olakšati dobivanje oštrih fotografija.
Brzina snimanja
Brzina rafalnog snimanja fotoaparata odnosi se na to koliko fotografija može snimiti u sekundi. Vrhunska kamera moći će snimiti između 12 i 30 slika u sekundi. Kamera srednje klase moći će napraviti oko 4 – 12 slika u sekundi.
Veća brzina rafalnog snimanja znači da ćete vjerojatnije uhvatiti određene trenutke, posebno brže radnje poput ptice u letu ili životinje koja trči.
Osim toga, budući da je brzina uzastopnog snimanja izravno povezana s ukupnim tehničkim mogućnostima fotoaparata, kamera s većom brzinom uzastopnog snimanja bit će bolje specificirana nego kamera s niskom brzinom uzastopnog snimanja.
Za safari je dobra ideja kamera koja može snimiti najmanje pet sličica u sekundi, ali više je uvijek bolje.

Najbolja kamera za Safari
Sada sam pokrio glavne značajke koje treba tražiti u fotoaparatu za safari. Sada ću dati popis nekih kamera koje sam preporučio za safari. Ovaj popis nije konačan jer očito postoji mnogo izbora.
Kombinacija ovog popisa s informacijama o tome što trebate tražiti kod safari kamere trebala bi vam dati dobru polaznu točku. Za one kamere koje vam omogućuju promjenu leća, također imam neke preporučene safari leće u sljedećem odjeljku.
Ove kamere poredane su približno prema cijeni, od niske prema visokoj, ali ćete naravno htjeti sami provjeriti cijene jer se razlikuju. Cijene počinju od oko 400 USD i idu do preko 3000 USD za vrhunske modele.
Panasonic Lumix DC-FZ80 / FZ82
Ako želite fotoaparat velike vrijednosti za safari koji je jednostavan za korištenje i ima dobar zum, Panasonicova premosna kamera Lumix DC-FZ80 odlična je opcija za razmatranje.

Lansirana u ožujku 2017., ovo je najjeftinija opcija na našem popisu kamera za safari, ali svejedno ćete dobiti mnogo kamera za svoj novac.
Prvo, tu je objektiv od 20-1200 mm (60x) sa stabilizacijom slike s oko pet stupnjeva stabilizacije. To je upareno sa senzorom od 18,1 megapiksela 1/2,3 inča koji također podržava 4K video.
Zaslon sa stražnje strane je fiksan, ali je omogućen dodir. Kamera ima omogućen WiFi i lagana je 616 g (21,7 oz). Glavna mana je što nema zaštitu od vremenskih uvjeta, iako to nije iznenađenje za ovu cjenovnu kategoriju. Trajanje baterije također nije spektakularno.
Međutim, dobivate izvrstan zum, a ovo je solidna proračunska opcija za safari kameru sa zumom koji će vam omogućiti snimanje još udaljenijih objekata.
Ključne specifikacije :20-1200 mm (60x) žarišna duljina, otvor blende f/2.8-5.9, 10 slika u sekundi, senzor od 18.1 megapiksela 1/2.3″
Težina :616 g / 21,7 oz
Trajanje baterije :330 udaraca
Cijena :Provjerite najnoviju cijenu na Amazonu ovdje, BiH ovdje, a Adorami ovdje
Panasonic Lumix ZS70 / (TZ90 u UK)
Ako želite kompaktni fotoaparat za safari po povoljnoj cijeni, pogledajte ovaj model Panasonic Lumix. Dobivate objektiv s optičkim zumiranjem od 30x (24 mm – 720 mm), senzor od 20,3 MP 1/2,3 inča, stabilizaciju slike, potpune ručne kontrole, pa čak i podršku za RAW.
Tu je i elektroničko tražilo, definitivan bonus u kompaktnom fotoaparatu po ovoj cijeni. To može olakšati komponiranje slika na jakom suncu. Što se tiče brzine, može snimati do 10 sličica u sekundi.

Noviji model izdan je 2019. – ZS80. Ovo dodaje Bluetooth i EVF više razlučivosti, ali ništa drugo.
Nismo sigurni da je to dovoljna nadogradnja da opravda razliku u cijeni, ali to ovisi o vama. Ako ih pronađete po istoj cijeni, onda biste mogli dobiti i ZS80, inače ZS70 ostaje naš izbor dok je još dostupan.
Ključne specifikacije :24-720 mm (30x) žarišna duljina, otvor blende f/3.3-6.4, 10 slika u sekundi, senzor od 1/2.3 inča od 20,3 megapiksela
Težina :322 g / 11,36 oz
Trajanje baterije :380 udaraca
Cijene na Amazonu ovdje, B&H ovdje i Adorama ovdje
Canon Powershot SX740
Canon već desetljećima proizvodi široku paletu fotoaparata, a na ovom ćete popisu pronaći nekoliko njihovih fotoaparata. Ovo bi bila naša Canonova opcija koju preporučujemo ako tražite kompaktni fotoaparat velike vrijednosti s dobrim zumom za safari.

Za svoj novac dobivate senzor od 1/2,3 inča od 20,3 MP i optički zum od 40x (24-960 mm). Kao i kod drugih kompaktnih fotoaparata s velikim zumom, dolazi s kompromisom da maksimalni otvor blende ide samo na f3,3, a pri maksimalnom zumu, skroz je dolje na f/6,9. Trajanje baterije također nije dobro pri 265 snimaka i nema tražila.
Ipak, to je jedan od najisplativijih kompaktnih fotoaparata sa zumom na tržištu, posebno u ovoj cjenovnoj kategoriji, a cijena je izvrsna za ono što dobijete. Samo ne očekujte čuda u pogledu kvalitete slike ili rada pri slabom osvjetljenju, pogotovo kada ste zumirani do kraja.
Ključne specifikacije :24-960 mm (40x) žarišna duljina, otvor blende f/3,3-6,9, 10 1 slika/sekundi, senzor od 1/2,3 inča od 20,3 megapiksela
Težina :299 g / 10,55 oz
Trajanje baterije :265 udaraca
Cijene na Amazonu ovdje, B&H ovdje i Adorama ovdje
Panasonic Lumix ZS200 (TZ200 u UK)
Ako su vam kvaliteta slike i performanse pri slabom osvjetljenju važniji od zumiranja, pogledajte Panasonicov Lumix ZS200.

Ovaj kompaktni fotoaparat dolazi sa senzorom od 1 inča od 20,1 megapiksela, što ga čini otprilike četiri puta većim od standardnih senzora kompaktnog fotoaparata od 1/2,3 inča.
Dobivate i objektiv od 15x (24-360 mm) s promjenjivim otvorom blende f/3.3 – f/6.4 i stabilizacijom slike. Ovo je zapravo prilično razumno zumiranje za većinu safari situacija, s izuzetkom malih udaljenih ptica.
Također ima potpune ručne kontrole, sučelje zaslona osjetljivog na dodir, elektroničko tražilo i mogućnost snimanja u RAW formatu.
To je definitivno malo skuplja opcija kada su u pitanju kompaktni fotoaparati za safari, ali taj optički zum je definitivno bonus, posebno u kategoriji senzora od 1 inča.
Ključne specifikacije: 24-360 mm (15x) žarišna duljina, otvor blende f/3,3-6,4, 10 slika u sekundi, senzor od 1 inča od 20,1 megapiksela
Težina: 340 g / 11,99 oz
Trajanje baterije :370 udaraca
Cijena na Amazonu ovdje, BiH ovdje i Adorama ovdje.
Canon Powershot SX70 HS
Canonova ponuda premosnih kamera još je jedna sposobna opcija. Sadrži impresivan 21-1365 mm (65x optički) zum objektiv, koji ima varijabilni maksimalni otvor blende od f/3.4-6.5. To je također jedna od najlakših mostnih kamera na tržištu, ako se uzme u obzir težina.

Objektiv je optički stabiliziran, pružajući do pet stupnjeva stabilnosti. Senzor od 1/2,3 inča nudi 20 megapiksela, što je dovoljno za većinu korisnika, posebno s obzirom na to da impresivno zumiranje znači da ne biste trebali puno izrezivati.
It has full manual controls as well as RAW support, and you get both Bluetooth and WiFi connectivity as well as 4K video support.
There are some drawbacks. Image quality at the zoom and wide angles is a little soft, and there’s no touch screen or weather sealing. The screen does flip out and tilt though.
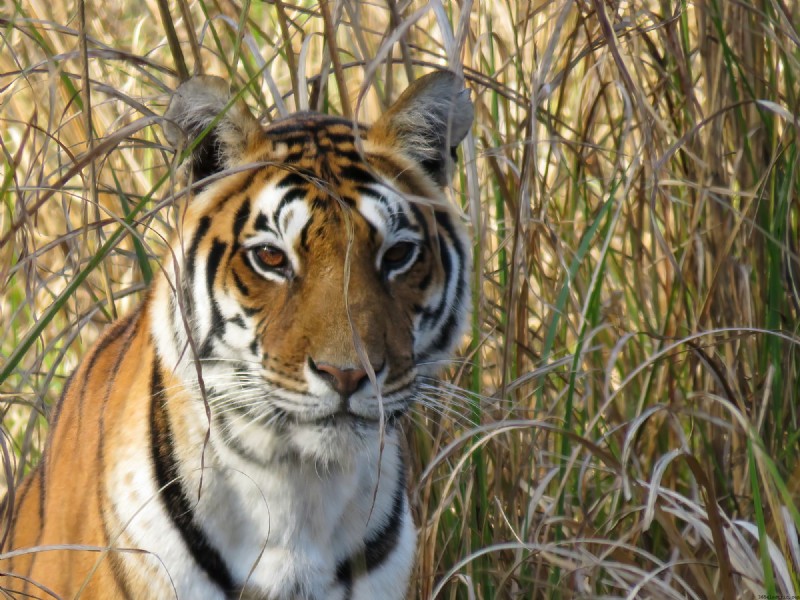
My parents have an earlier model of this camera (they provided the tiger photo earlier in the post) and they have been very happy with the results from safaris in destinations around the world.
Key Specifications :21-1365mm (65x) focal length, f/3.4-6.5 aperture, 10 images / second, 20 megapixel 1/2.3″ sensor
Weight :610 g / 21.5 oz
Battery life :325 shots
Price :Check latest price on Amazon here, B&H here, and Adorama here
Nikon D3500
Nikon are a well known brand well it comes to DSLR cameras, and the Nikon D3500 is an excellent value DSLR. It also comes with the big advantage that you get access to all the Nikon and Nikon compatible lenses, which is a huge choice.
For your money, you get a 24MP APS-C sized sensor, full manual controls and RAW support. Burst speeds are a little slow at 5 frames per second, but battery life is incredible at 1,550 shots. It’s also relatively light for a DSLR.
There’s no weather sealing, and the screen doesn’t feature any touch or flip out technology. There’s also no image stabilization, but a great many lenses are available which do feature this technology. If you want a budget DSLR for safari, this is a good option.
Key Specifications: 5 images / second, 24 megapixel / APS-C sensor
Weight: 365g / 12.87oz
Battery life: 1550 shots
Price on Amazon here, B&H here and Adorama here.
Canon Rebel SL3 (EOS 250D in Europe)
The SL3 (or EOS 250D) is one of Canon’s budget-oriented DSLR cameras. The Canon Rebel line is an excellent series of good value entry-level DSLR cameras (my first DSLR was a Rebel), and the SL3 is no exception.
It’s one of the smaller SLR cameras Canon has made, and it offers great performance for an excellent price. Specs include a touchscreen, 24.2MP APS-C sized sensor, WiFi, 1070 shot battery capacity, 4K video support, and compatibility with all of Canon’s lenses (and a great many third party lenses.).
There’s no image stabilization, but as with the Nikon there are a great many lenses available which do feature this technology. It’s also not weather sealed.
Key Specifications: 5 images / second, 24.2 megapixel APS-C sensor
Weight: 449g / 15.84oz
Battery life: 1070 shots
Price on Amazon here, B&H here and Adorama here.
Nikon Coolpix P950
The Nikon Coolpix P950, released in 2020, has a lot going for it. First, you get an impressive 24-2000mm lens, which is an 83x optical zoom. That should be more than enough for any kind of safari photo, and in particular for those of you looking for a camera for bird photography.
The maximum aperture starts at a wide f/2.8, and narrows down to f/6.5 when zoomed in. Given the length of the lens, this is to be expected.

The lens is stabilized, and the stabilization offers an impressive 5.5 stops of improvement. Sensor wise, you’re looking at a 1/2.3″ 16MP sensor, which offers a good balance between size and low light performance.
Image quality is good although softens as you zoom further in. This is quite common on compact and bridge cameras with big zooms. There is a reason high end mirrorless and DSLR lenses cost thousands of dollars after all! However, I think most users will be happy with the performance.
The megapixel count isn’t particularly high, but you are unlikely to need to crop much given you have an incredible zoom.
The P950 has support for RAW photography as well as manual modes that let you set shutter speed, ISO, and aperture. There’s also 4K video support as well as WiFi and Bluetooth connectivity options.
There are a few downsides. Battery life is quite low at 290 shots, and the huge lens means this camera is quite heavy for a bridge camera, weighing just over 1 kg (2.2 lb). There’s also no touchscreen, or weather sealing.
Key Specifications :24-2000mm (83x) focal length, f/2.8-6.5 aperture, 7 images / second, 16 megapixel 1/2.3″ sensor
Weight :1005 g / 35.4 oz
Battery life :290 shots
Price :Check latest price on Amazon here, B&H here, and Adorama here
Nikon Z50
The Z50 is Nikon’s more entry level mirrorless camera, which features a 20.9MP APS-C sized sensor, which Nikon calls DX sized.

Despite being entry-level, you still get a lot for your money. There’s 11fps burst shooting, 4K video support, a tilting touchscreen display and an OLED viewfinder. You also get Bluetooth and WiFi connectivity, with battery life rated to around 300 shots.
This is a great lightweight mirrorless camera at a good price, however do be aware when comparing this and other DSLR and mirrorless cameras to other cameras on our round up that you will have to buy a lens as well. It is also compatible with most of Nikon’s lenses via an adaptor, which gives you a huge choice.
It even has some weather-sealing, although the pop-up flash means it isn’t considered as weather-sealed as some of its more expensive siblings.
Key Specifications :11 images / second, 20.9 megapixel APS-C sensor
Weight :450g / 15.87 oz
Battery life :320 shots
Price on Amazon here, B&H here, and Adorama here
Panasonic Lumix FZ1000 II
If you like the idea of a bridge camera but would prefer improved image quality and low light performance over a huge zoom, check out the FZ1000 II from Panasonic.

Released in 2019, this camera features a 20.1 Megapixel 1 inch sensor. This means you get better low light performance than bridge cameras with smaller sensors, as well as higher image quality.
Unfortunately, a larger sensor comes with some tradeoffs, namely the zoom. The FZ1000II features a 25-400mm lens, equivalent to a 16x optical zoom. This is definitely on the low end for a bridge camera, but if you’re not too worried about shooting very distant subjects, 400mm is still on par in terms of magnification with DSLR or mirrorless zoom lenses.
When I go on safari, I find a 400mm lens works fine 99% of the time. The only exception really is for small birds, where a longer lens is nearly always helpful.
The other nice thing about this lens is that it features a wide f/2.8 aperture. This drops to f/4 when zoomed in, which is still very respectable. A wider aperture lets more light in, meaning you can shoot at higher shutter speeds and lower ISO values. The lens is also image stabilized, offering 3-5 stops of stabilization.
The display tilts and swivels out from the camera and is touch enabled. You also get WiFi and Bluetooth support, as well as a relatively good battery life of 440 shots. Video wise, you get 4K video support. Despite having a larger sensor, the camera is not too heavy at 810 g (1.79 lbs).
There’s no dust or water protection, which is a shame in a camera at this price point, and probably the main downside. Otherwise though, if you are happy with the zoom range, this is a solid option.
Key Specifications :25-400mm (16x) focal length, f/2.8-4 aperture, 10 images / second, 20.1 megapixel 1″ sensor
Weight :810 g / 28.5 oz
Battery life :440 shots
Price :Check latest price on Amazon here, B&H here, and Adorama here
Samsung Galaxy S22 Ultra / iPhone 14 Pro Max
I appreciate it’s a little jarring to go from cameras to smartphones, but I know that many of you might not want to take anything other than a smartphone on safari. For many shots, a smartphone will work just fine, especially in those scenarios where the animals are very near.
If you are going to take a smartphone for your safari camera, then you might as well pick the best option. The two contenders I recommend are either the Samsung Galaxy S22 Ultra or the iPhone 14 Pro Max. I’ve put these together because at this point, most people have likely settled on Android or iPhone.
Specs wise they are not dissimilar when it comes to the camera technology. The most important feature, and the reason I chose these two phones for safari photography, is that they both have a relatively good optical zoom (by smartphone standards at least). That means you’ll still be able to shoot wildlife that is a little further away and get good results.
The Samsung S22 Ultra actually has four cameras, each with its own sensor. Most importantly, there’s a 10x (230mm equivalent) optical zoom on a 10 megapixel 1/3.52″ sensor. It’s quite a small sensor even by smartphone standards, but that 10x zoom could definitely come in handy.
The iPhone 14 Pro Max has three cameras. The longest reach it has is from a 2x (77mm equivalent) optical zoom on a 1/3.4″ sensor.
Both phones offer a range of photography focused features, from image stabilization through to powerful computational technology to improve how your images look. If you really want a smartphone for your safari, one of these two options would be our pick.
Price on Amazon for Samsung here, Apple on Apple store here.
Sony RX100 VII
If you like the idea of a compact camera but don’t want to sacrifice too much image quality, consider the RX100 VII. Released in August 2019, in our opinion this is one of the best compact cameras for safari that money can buy, and we travel with an earlier version ourselves.

The RX100 VII has an 8x optical zoom, equivalent to a 24mm – 200mm lens. That’s about the absolute minimum focal length we’d recommend for a safari. It also has a 20.1 megapixel 1-inch sized sensor like the Panasonic ZS200, which is the closest alternative.
The main differences are that the ZS200 has more zoom at the expense of a narrower aperture. The RX100 has a faster burst rate at 20 frames per second, and it also has a much-improved focus system which can lock on and track subjects very quickly. As you might imagine, that can come in very handy for safari photography.
Sony have used the learning acquired from the focus technology in their high-end professional cameras and it definitely shows.
Image quality in the Sony is also a little better than the Panasonic.
The RX100 also has image stabilisation, a tilting screen and an impressive electronic viewfinder. This is a great all-round compact camera, although it is quite expensive. If the price is too high, the ZS200 offers a great deal at a much more reasonable price.
Key Specifications: 24-200mm (x) focal length, f/2.8-4.5 aperture, 20 images / second, 20.1 megapixel /1″ sensor
Weight: 302g / 10.65oz
Battery life: 240 shots
Price on Amazon here, B&H here and Adorama here
Sony A6600
Sony have been making excellent consumer oriented mirrorless cameras for a long time. The A6600 is the current top of their A6xxx range.
The A6600 has a lot of technology packed into its relatively diminutive body. There’s a 24.2 megapixel APS-C sized sensor which can shoot at 11 frames per second. It has Sony’s impressive real-time subject tracking which can recognise and track human and animals’ eyes very quickly.
You also get in body image stabilization, a flip up touch screen, WiFi and Bluetooth connectivity, an impressive 810 shot battery life and weather sealing. All in all, this is a feature packed camera that would be a great option for safari photography when paired with a good telephoto lens.
Key Specifications :11 images / second, 24.2 megapixel APS-C sensor
Weight :503g / 17.74oz
Battery life :810 shots
Price on Amazon here, B&H here and Adorama here
Canon EOS R7
This mirrorless camera for Canon was launched in 2022, and it is packed with features that make it an excellent choice for a safari camera. In fact, a lot of the technology in this camera, especially around autofocus, is borrowed from Canon’s high-end EOS R3, a camera which retails in excess of $6,000 USD.
At the heart of this camera is a 32.5MP APS-C sized sensor. That is fully image stabilized, and it supports shooting at 15 frames per second (mechanical) and a staggering 30 frames per second (electronic).
Perhaps the most impressive feature though is the autofocus. This can identify and track a range of subjects, including animals and birds. I have used this system extensively and it is amazing how well it can lock onto even a fast moving subject to enable you to get sharp shots every time.
You also get a touch-enabled flip screen, weather sealing, Wi-Fi and Bluetooth connectivity, and compatibility with a massive selection of Canon lenses. Battery life is reasonable at 660 shots, and the weight without a lens is also good at 612g/ 21.58oz.
If you are looking for an APS-C sensor camera for safari photography, this would be at the top of my list.
Key Specifications :30 images / second, 32.5 megapixel APS-C sensor
Weight :612g / 21.58oz
Battery life :660 shots
Price on Amazon here, B&H here and Adorama here
Sony Cyber-shot DSC-RX10 IV
If you love the idea of a bridge camera but don’t want to sacrifice image quality, speed and weather sealing, look no further than the stunning Sony Cyber-shot DSC-RX10 IV. Sony has been leading the way with high performance camera sensors for a number of years, and the RX10 IV is the current pinnacle of their bridge camera offerings.
This is probably the best bridge camera for safari, although as with every decision, there are of course some compromises. The main one being price. This is definitely a premium offering. However, you do get a lot for your money.

To start with, this is a 1″ sensor camera, with 20.1 megapixels of resolution. That is paired with a 24-600mm (25x optical) lens, which we think will be enough for most safari needs.
The lens starts out at a very wide f/2.4, meaning lots of light can reach the sensor. At 600mm the lens stops down to f/4. This is still very impressive, when you consider that a 600mm f/4 lens for a DSLR will set you back five figures! The lens is also stabilized, offering around 4.5 stops of improvement.
You also get one of the fastest autofocus systems in the world, Wi-Fi, Bluetooth and 4K video, superb image quality, a touch-enabled screen, a weather sealed body, and a truly impressive 24 frames per second shooting speed. Naturally there are full manual controls and RAW support.
With all that tech onboard, combined with the relatively large sensor and wider aperture zoom lens, this camera does weigh quite a bit. In fact, at 1095g (2.4lbs) it’s heavier than some DSLRs. However, if quality and performance are your key goals, and you just want an all-in-one camera that will just work, then this camera still offers excellent value for money.
If the price is a bit much, then consider the earlier model RX10 III, which offers similar features at a lower price point. You will lose the touchscreen, and the autofocus and shooting speeds are a little slower.
Key Specifications :24-600mm (24x) focal length, f2.4/4 aperture, 24 images / second, 20.1megapixel 1″ sensor
Weight :1095 g / 38.6 oz
Battery life :400 shots
Price :Check latest price on Amazon here, B&H here, and Adorama here
Sony A7c
If you like the look of the Sony A6xxx line but want something with a full frame sensor, consider the Sony A7C.

Somehow, Sony has managed to fit a full frame sensor into a body that is almost identical in size and weight to the A6600, making it one of the smallest full frame mirrorless cameras on the market today.
They haven’t cut corners in terms of features either. You get a 24.2MP sensor, 10fps shooting, in body image stabilization, 4K video, WiFi, Bluetooth, vari-angle touchscreen and weather proofing. It also has excellent animal and people tracking with Sony’s eye-tracking autofocus system.
It even manages 740 shots on a charge. A fantastic option if you want something with a full frame sensor but in a relatively compact size.
The only downside is that it can feel a bit small and fiddly in the hands. However, that is a minor niggle for what is otherwise a standout option.
Key Specifications :10 images / second, 24.2 megapixel full frame sensor
Weight :509g / 17.95oz
Battery life :740 shots
Price on Amazon here, B&H here, and Adorama here
Canon EOS R6
In 2020, Canon launched two excellent mirrorless camera options, namely the Canon EOS R6 and the Canon EOS R5.

These were the first full frame mirrorless cameras from Canon to feature in-body image stabilization, which offers an amazing 8 stops of stabilization when used with a compatible lens.
The R6 is the lower priced version of the two, but it is still very capable. It has a 20.1MP full frame sensor, autofocus that can track both people and animals, up to 20 frames per second burst shooting, Wi-Fi &Bluetooth, 4K video, as well as a flip-out touchscreen. It’s also dust and drip-proof.
The fantastic autofocus system is brilliant on safari, as is the high burst shooting rate.
There’s a lens adaptor which will let you use all EF and EF-S Canon lenses with the camera, which opens the door to a massive choice.
The main downside is that on paper the megapixel count does feel a bit miserly when stacked up against the competition. Honestly though, we don’t think it’s that big of a deal, and it does mean that high ISO and low light performance is fantastic. The battery life is also not that great compared to its peers.
You can see our full Canon EOS R5 review here, which covers a lot of the features of the R6, to see if it might be the camera for you.
Key Specifications: 20 images / second, 20.1 megapixel full frame sensor
Weight: 680g / 23.99oz
Battery life: 360 shots
Price on Amazon here, B&H here and Adorama here.
Sony Alpha a7 IV
Sony effectively started the mirrorless camera revolution, and the Sony a7 IV, as the name suggests, is the fourth iteration in their excellent a7 range.
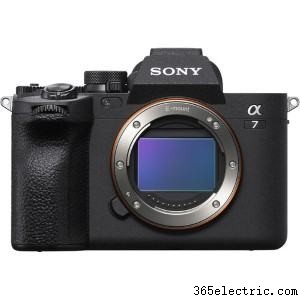
It comes with a full frame 33MP full frame sensor, flip out LCD display, a high refresh rate EVF, WiFi, 10fps burst shooting and a fast autofocus system that includes Sony’s excellent animal and people eye tracking.
It also has good battery life at 580 shots per full charge, and includes weather sealing, meaning it’s an excellent all-round camera and a solid option for safari. The burst rate is a bit slower than the Canon R6, but you do get a higher resolution sensor as a trade-off, as well as extended battery life.
Key Specifications :10 images / second, 33 megapixel full frame sensor
Weight :659g / 23.25oz
Battery life :580 shots
Price on Amazon here, B&H here and Adorama here.
Nikon Z7 II
The Nikon Z7 II is the second iteration of the Z7 model, which is towards the upper end of Nikon’s mirrorless camera range. You get a lot for your money. There’s a 45.7MP full frame sensor, weather sealeding, tilting touch screen and it has WiFi and Bluetooth. Battery life is also good enough at 420 shots.
The main downside is reviews suggest the autofocus system, whilst good, isn’t quite up to the performance of the Sony and Canon options. A burst speed of 10 frames a second is also at the lower end in this price bracket, similar to the Sony A7 IV.
However, Nikon users will likely appreciate the familiar interface and the fact that it’s compatible with the whole range of Nikon lenses with an adaptor.
Key Specifications :10 images / second, 45.7 megapixel full frame sensor
Weight :705g / 24.87oz
Battery life :420 shots
Price on Amazon here, B&H here and Adorama here.
Canon EOS R5
I will admit to being a little bit biased as this is the camera I actually use on a day-to-day basis, and that I have shot my most recent safaris on. I wrote a full review of the R5 here.
In summary though, I think this is a phenomenal camera. Let’s look at the specs. You get a 45 megapixel full frame sensor, with built-in image stabilization. It can shoot up to 20 frames a second. The autofocus system for tracking animals and people is truly incredible. It’s also remarkably versatile as an all-round camera, able to do everything from landscapes to wildlife.
There’s WiFi, bluetooth, a flip out touchscreen, and loads of customization options so you can set it up to work for you. It also supports 8K video, if you want to shoot video. You also get access to Canon’s massive range of lenses, including the older EF and EF-S lenses via an adaptor.
The only real downside is that it’s expensive, and the battery life at 320 shots means spare batteries are an essential purchase. Other than that though, this was my pick for my favourite camera for safari.
Key Specifications :20 images / second, 45 megapixel full frame sensor
Weight :738g / 26.03oz
Battery life :320 shots
Price on Amazon here, B&H here and Adorama here
Safari Camera Recommendations Summary
If you are finding the above list of recommended cameras and their specifications a bit overwhelming but have a general idea of your budget and what kind of camera you want, here are some personal recommendations of the best camera for safari across budgets and types of cameras:
- Best Safari Camera Under $500 :Panasonic Lumix DC-FZ80 / FZ82
- Best Safari Camera under $1000: Nikon Z50
- Best Safari Camera under $5000: Canon EOS R5
- Best Smartphone for Safari :Samsung Galaxy S22 Ultra
- Best Compact Camera for Safari :Sony RX100 VII
- Best Bridge Camera for Safari :Sony DSC-RX10 IV
- Best Mirrorless Camera for Safar i:Canon EOS R5
Hopefully if you are having a hard time deciding, the above list will give you a good place to start your search for a specific camera.
But if you have any questions, just ask me in the comments section at the end of the article and I am happy to try to provide advice on which camera (and lens) might be best for you given your budget and what you want to do with it.
The Best Lenses for Safari
If you decide to buy a mirrorless or DSLR camera, then you are going to also need to buy a lens to go with it. Whilst some cameras may come with a lens, in most cases this won’t be ideal for safari as it won’t have sufficient reach.
There are a great many lenses on the market, and they are not generally compatible with different camera systems due to different mounting systems. If you want more background on lenses and what to look for in general, see my guide to the best lenses for travel photography, which breaks down all the terminology in detail.
I’m not going to be able to cover every lens out there, but I will provide a quick rundown of what I think are some of the best options on the market across a variety of camera systems and price points. This should give you some ideas for what to look for.
I’m going to primarily focus on longer focal lengths for wildlife photography, but do also consider bringing a wide-angle lens for the landscape opportunities as well. Ideally, for wildlife photography you want around a 400mm lens if your budget will allow for it.
I will also be recommending zoom lenses, meaning you can change the focal length, as this gives a lot more compositional control compared to a fixed focal length lens. There is a small loss in image quality and maximum aperture as a result, but this is very much worth the trade-off in my opinion for most users.
70-300mm lenses for safari
Sony, Nikon, and Canon all have at least one 70-300 lens available, which tends to be a fairly reasonably priced offering.
Most of these lenses have a variable aperture of f/4-5.6 and offer a good compromise between size, weight, image quality and affordability.
For example, see this Canon 70-300, this Nikon 70-300 and this Sony 70-300. This popular focal length is also available from third party manufacturers, such as with this Tamron for the Sony mount. If you are looking for a more budget safari lens, one of these is likely going to be a good pick.
300mm would be the absolute minimum I’d recommend for a lens for safari. However, I appreciate not everyone wants to spend a huge amount on camera equipment, and one of these lenses is a good way to get a reasonable reach in a relatively lightweight package.
100-400mm lenses for safari
The 100-400mm range is one of the most popular for safari photographers. 100mm lets you get quite a lot of the scene in shot, whilst 400mm will let you zoom in quite close on most subjects. Most of these lenses come with a variable aperture of around f/4.5 – f/5.6.
There’s a wide range of choice at the 100-400mm range across a number of systems. At the higher end you have the weather-sealed, heavier options like this Canon 100-400, this Sony 100-400 and this Nikon 100-400.
If you are willing to sacrifice your maximum aperture, you can save a bit of money with something like this Canon 100-400 f/5.6-8 for RF mount cameras, or this Sigma 100-400 f/5-6.3.
Generally, I’d advise trying to get the widest aperture you can afford as it will make a big difference in low light situations. However, I did want to make it clear that there are options out there across a range of budgets.
Other telephoto lens options for safari.
There are of course other options that are worth considering. If you want more reach, consider the Canon 100-500 f/4.5 – 7.1 for RF mount, or the excellent Sony 200-600 f/5.6-6.3.
If you want more reach but don’t want to spend as much, you can save money by using third party lenses from the likes of Sigma and Tamron for example. Image quality and autofocus speeds might be marginally impacted, but the price difference can be significant.
For example, check out this Tamron 150-600 f/5 – 6.3, which is available in a range of mounts for different camera systems. You get an excellent focal range, image stabilization and weather sealing at what is a very reasonable price. Sigma also do a range of 150-600mm lenses for different mounts.
Lens and Camera Rental for Safari
A high-end camera and lens can be a very expensive investment, which might not make a lot of sense for one-off usage. You obviously want to get great photos on your trip, but buying an expensive telephoto zoom lens or high specification full frame body that you only plan to use once might not make sense.
In this case, consider renting your camera equipment. A company like Lens Rentals will allow you to rent a lens and a camera body at a much lower cost than buying it outright. They also give you the option to purchase the gear rather than return it, so if you love the experience then you can invest having tested the gear out.
This is definitely worth looking into if you want high end gear but don’t want to invest into an expensive setup for long term use. You can browse what they have available here.
Accessories for Safari
Now that you have your camera and lens figured out, I wanted to share some tips for what camera and photography accessories you may want to bring on safari.
Memory Cards
You are going to be taking a lot of photos when on safari. Memory cards are not very expensive these days, and it is worth having a backup memory card as well as plenty of memory.
I recommend at least a 64GB memory card. If you are travelling with a laptop then you can back up your photos as you go. If you prefer to travel light, then you will want to pack many more memory cards so you don’t run out of space on your trip.
Spare Batteries
It is definitely worth bringing at least one spare battery for your camera, and ideally two. These are easy to keep on you or in your photography bag and come in handy when you are out all day.
You don’t want to be half way through a busy day and run out of battery, and then potentially miss some great shots. Modern mirrorless cameras in particular can eat through batteries quickly, so a spare or two is definitely a must in my opinion.
USB Battery Charger / Power Pack
As well as spare batteries, you might consider bringing a USB power pack and USB powered camera battery charger. This will allow you to charge your camera batteries while on the go from the battery pack (or a USB outlet in your vehicle).
Some locations you stay at on safari may also have limited power outlet availability, especially in the more remote areas or if you are staying in tented camps. In these scenarios, they often have USB power outlets from solar panels, but might not have higher voltage outlets.
In these situations, a USB battery charger for your camera batteries will be invaluable. I travel with both a USB battery pack and a USB powered battery charger for my Canon camera batteries, and it has come in handy many times.
Monopod / Tripod
A common question is whether or not you should take a tripod on safari. I would say that in general, for wildlife photography from a vehicle, a tripod is not going to be very useful. There likely won’t be enough room to set it up unless you have a vehicle specifically set up for it.
Another option is a monopod, which is certainly something to consider, depending on your vehicle configuration. If you are also likely to be doing foot-based safaris and have big lenses, then a monopod is definitely something to consider.
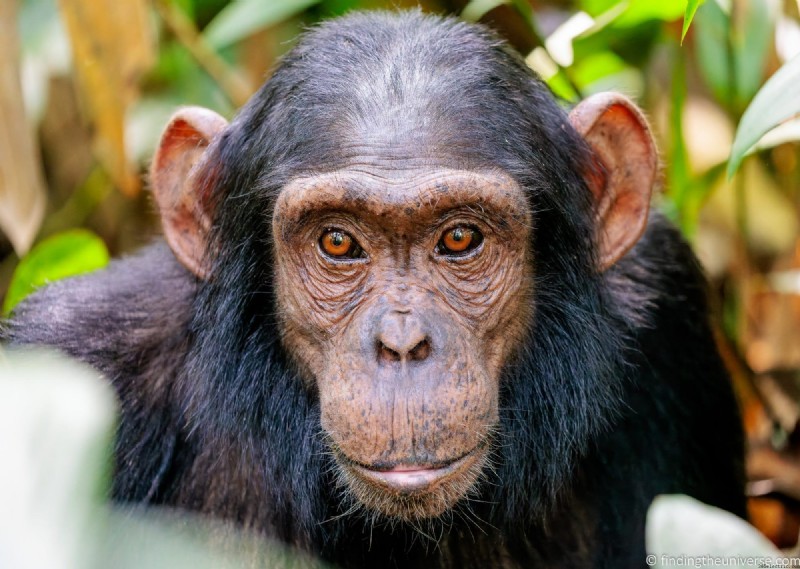
For example, I used a monopod when shooting chimpanzees in Uganda, a trip which required a hike through the jungle. A monopod allows for very quick movement of your camera, often necessary in wildlife photography, whilst still taking most of the weight off your shoulders.
A good option if you want to pack a tripod for your safari trip but are maybe also thinking you may want a monopod is to bring a travel tripod that can convert to a monopod such as the recent VEO 3 range from Vanguard.
I’ve been an ambassador for Vanguard for many years now. If you see something on their store that works for your equipment, you can save money using our exclusive Vanguard discount code. This will give you 20% off everything in the Vanguard store.
Just use the code FindingTheUniverse for your discount! This code works in the Vanguard USA, UK, Australia, Spain, and Germany stores.
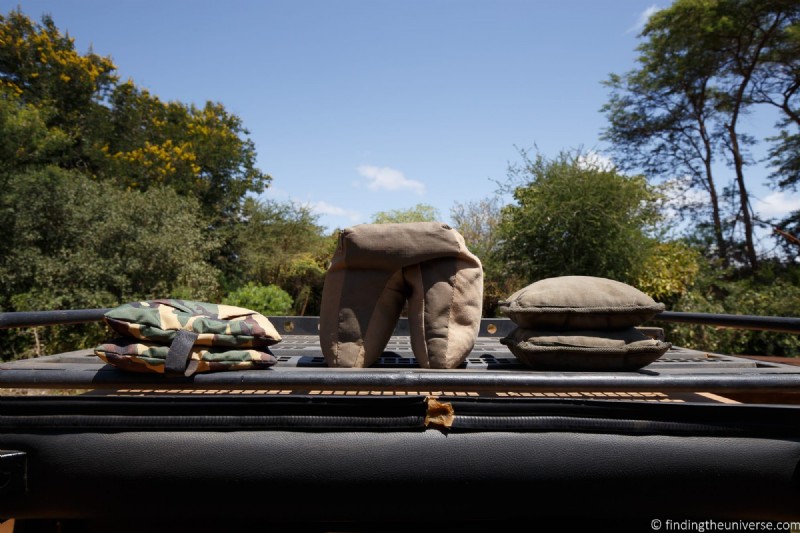
Photography Bean Bag
For vehicle-based photography, the most useful accessory in my opinion is a photography bean bag rather than a tripod or monopod. I used these every day we did vehicle safaris on our recent trip.
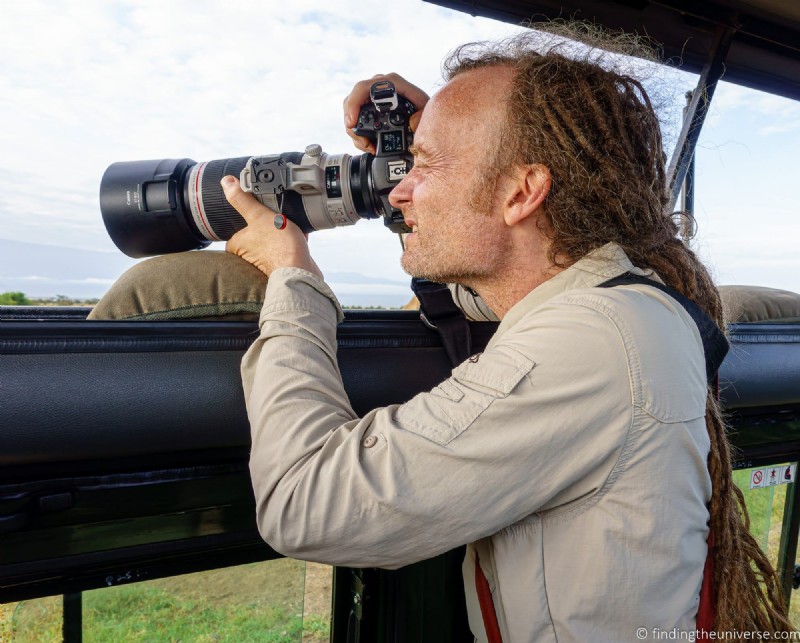
Photography bean bags can be placed on the roof of the vehicle for use when looking out a pop-up top, or over a window or window sill for in-vehicle use.
Photography bean bags are normally made out of a durable canvas (or similar material), and have a zipped opening so you can add or remove the contents. These can be polystyrene beads, or you can simply fill them with something environmentally friendly like dried kidney beans when you arrive in a destination.
I used a photography bean bag extensively on my safari trips, and they are really an invaluable item. You can see some options online here.
Appropriate Clothing
Whilst this isn’t camera specific, having the right clothing for your safari can improve your overall experience. If you are comfortable and prepared for the weather, you are also likely to get better photos.
Personally, I prefer clothes with lots of pockets where I can store things like spare batteries, lens wipes and lens caps. Most safaris tend to be hot, so you also want lightweight clothing.
A vest is a popular option for photographers such as those by ScotteVest, and I own a couple of these vests. They are great for travel days and airports as well.
But my preference on safari are the safari focused shirts from the brand Craghoppers. These have a range of features for travel, including being quick-drying and sun proof. They are really lightweight, and are available in safari appropriate colors (light greens and beige are good, blue and black are bad if going to teste fly infested areas). Some models, like the NosiLife line, even come with built-in insect repellent.
The main thing I love about them though is that they have lots of pockets and so it’s easy for me to quickly access a spare battery without having to root around in my bag. You can get them from REI in the US here, as well as on their Amazon store here and in the UK here.
Comfortable Camera Strap
A safari trip is going to involve you carrying and using your camera a lot. You are likely going to be bumping along on dirt roads, sticking your head out of the safari vehicle, and hiking along in forests during your trip. So you want to make sure you have both a secure and comfortable camera strap.
It is likely that your camera came with a manufacturer branded strap such as one from Canon or Nikon. This strap may be fine for some people. For others, especially if you have a heavy camera setup, it may not provide enough support or comfort.
I personally use Peak Design straps, as I find them much more comfortable than a standard camera strap. You can purchase them from Peak Design here, as well as on Amazon or B&H Photo.
A Good Camera Bag
A safari can be a dusty and bumpy experience, two things that can cause damage to cameras and lenses. To protect your gear in between shoots, I highly recommend getting a good camera bag.
Camera bags are specially designed to provide padding and protection for your gear, and many of them also come with rain covers. This means that you have somewhere safe, protected and padded to put your gear.
Personally, I use Vanguard photography bags and I’ve been an ambassador for Vanguard for many years now. If you see something on their store that works for your equipment, you can save money using our exclusive Vanguard discount code. This will give you 20% off everything in the Vanguard store.
Just use the code FindingTheUniverse for your discount! This code works in the Vanguard USA, UK, Australia, Spain, and Germany stores.
There are of course a range of other camera bags available, you can see the options on Amazon here and B&H Photo here.
Camera Cleaning Kit
No matter how well you protect your camera and lens, it is inevitable that it is going to get some dust or dirt on it. To help keep it clean, I recommend picking up a camera cleaning kit. These are normally fairly inexpensive and some come with carrying cases which are handy for travel.
They can come with a range of different items. My recommendation is to get one which includes a blower and a lens cloth like this, which will make it easier to remove the dust.
Further Reading
That’s it for my guide to the best safari camera. If you found this useful, you might enjoy some of my other photography content. Here are some articles to get you started.
- I have a detailed guide full of safari photography tips to help you get great photos whatever your camera is
- I have a guide to my favourite photo editing applications, as well as the best alternatives to Lightroom
- Once you’ve taken all your photos you don’t want to lose them! Read our guide to backing up your photos for an idea of how to keep them all safe.
- Wildlife photography can often result in noisy images. See my guide to the best noise reduction software for some ideas on how to get the best out of your photos even when they might be a bit noisy
- We have a guide to how to use a compact camera, how to use a DSLR camera, and how to use a mirrorless camera. We also have a guide to how a DSLR works
- Knowing how to compose a great photo is a key photography skill. See our guide to composition in photography for lots of tips on this subject
- We have a guide to what depth of field is and when you would want to use it.
- We are big fans of getting the most out of your digital photo files, and do to that you will need to shoot in RAW. See our guide to RAW in photography to understand what RAW is, and why you should switch to RAW as soon as you can if your camera supports it.
- You’re going to need something to run your photo editing software on. See our guide to the best laptops for photo editing for some tips on what to look for.
- If you’re looking for more advice on specific tips for different scenarios, we also have you covered. See our guide to Northern Lights photography, long exposure photography, fireworks photography, tips for taking photos of stars, and cold weather photography.
- Color accuracy is important for photography – see our guide to monitor calibration to ensure your screen is set up correctly.
- If you’re looking for a great gift for a photography loving friend or family member (or yourself!), take a look at our photography gift guide,
- If you’re in the market for a new camera, we have a detailed guide to the best travel cameras, as well as specific guides for the best cameras for hiking and backpacking, the best compact camera, best bridge camera, best mirrorless camera and best DSLR camera. We also have a guide to the best camera lenses.
- If you want a camera or lens, but the prices are a bit high, see our guide to where to buy used cameras and camera gear for some budget savings options.
- We have a guide to why you need a tripod, a guide to choosing a travel tripod, and a round-up of our favourite travel tripods
Looking to Improve Your Photography?
If you found this post helpful, and you want to improve your photography overall, you might want to check out my online travel photography course.
Since launching the course in 2016, I’ve already helped over 2,000 students learn how to take better photos. The course covers pretty much everything you need to know, from the basics of how a camera works, through to composition, light, and photo editing.
It also covers more advanced topics, including astrophotography, long exposure photography, flash photography, and HDR photography.
You get feedback from me as you progress, access to webinars, interviews and videos, as well as exclusive membership of a Facebook group where you can get feedback on your work and take part in regular challenges.
It’s available for an amazing one-off price for lifetime access, and I think you should check it out. Which you can do by clicking here.
And that’s it! I’d love to hear about your thoughts on wildlife photography on safari, and am happy to answer any questions you have. Just pop them in the comments below and I’ll get back to you as soon as I can.