Popravak:Sigurnosna kamera noću mutna
Glavna pritužba ljudi koji posjeduju CCTV sustav sigurnosnih kamera ima određene kamere koje su mutne ili zamagljene noću.
A činjenica je da se većina zločina događa noću, što znači da će mutna ili zamagljena CCTV kamera poraziti cijelu svrhu postojanja sustava sigurnosnih kamera.
Ako imate sigurnosnu kameru koja prikazuje mutnu ili maglovitu sliku, vrlo je važno riješiti problem. Postoji više razloga zašto sigurnosna kamera prikazuje mutnu ili maglovitu sliku tijekom noći (ili čak danju).
Ovaj vodič govori o nekoliko pristupa kako popraviti sigurnosnu kameru koja prikazuje mutne ili maglovite slike. Pročitajte i slijedite prijedlog dok ne uklonite ovaj problem iz sustava sigurnosnih kamera.
Kako popraviti:Sigurnosna kamera noću je mutna
Kao što smo ranije spomenuli, postoji mnogo razloga zašto slika sigurnosne kamere može biti mutna ili maglovita:to može biti fizički problem s IR svjetlima ili staklom ili ponekad povezan sa softverom (iako je prilično rijetko). U nastavku smo prikupili nekoliko savjeta o tome kako riješiti problem mutne/maglovite slike.
Problem IR refleksije (IR bleeding)
Danas su gotovo sve sigurnosne kamere, IP, HD analogne, koriste ugrađena IR (infracrvena) svjetla za osvjetljavanje područja i snimanje slika tijekom noći. U osnovi, IR svjetla su ono zbog čega sigurnosna kamera vidi u mraku.
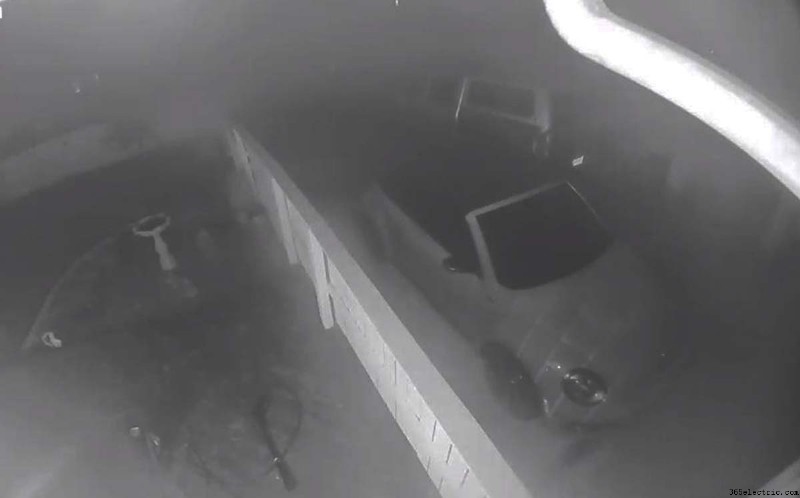
Međutim, vrlo često se ovo IR svjetlo odbija od bliskog objekta i vraća "zaslijepljujući" leću (oko) fotoaparata.
Ovaj odraz svjetlosti čini sliku mutnom ili maglovitom. U nekim je slučajevima refleksija toliko jaka da je kamera praktički neupotrebljiva.
Ispod je slika dome sigurnosne kamere. “Točke” oko objektiva kamere zapravo su IR svjetla, kada padne mrak automatski će se uključiti i osvijetliti područje pod nadzorom.
 Kao što smo rekli, svjetlo koje emitira IR blok može se odbiti na vanjsku čvrstu površinu (kao što je zid) ili od samog stakla kupole. Kao rezultat toga, slika će biti mutna ili maglovita na CCTV sustavu.
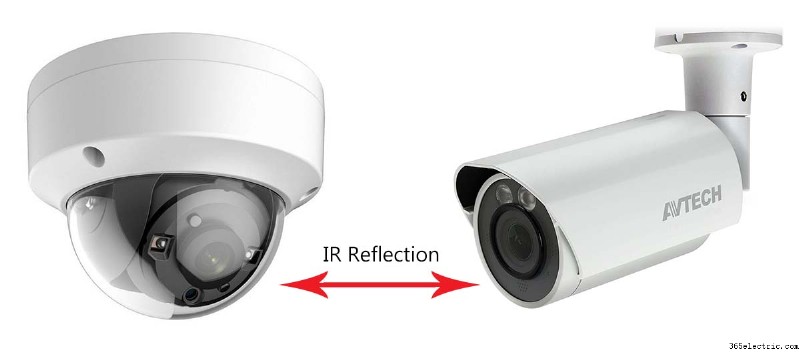
Općenito govoreći, ova IR refleksija je češća na kupolastim kamerama, ali čak i bullet ili PTZ kamere mogu imati isti problem. Postoji nekoliko stvari koje možete učiniti kako biste popravili IR refleksiju (ili IC krvarenje) na sustavu sigurnosnih kamera.
1. Nedostaje gumeni prsten na kameri
Kao što ste vjerojatno primijetili, oko leće fotoaparata nalazi se gumeni prsten koji je čvrsto pritisnut na staklo.
Ovaj gumeni prsten se koristi za izbjegavanje IR krvarenja što je tehnički izraz za IR svjetla. Provjerite je li gumeni prsten tamo i nije oštećen.
If the rubber is missing, the IR lights will hit the camera’s lens and make the picture look blurry/foggy. In some cases, rookie CCTV installers remove these rubber rings while pointing the camera and then never put them back.
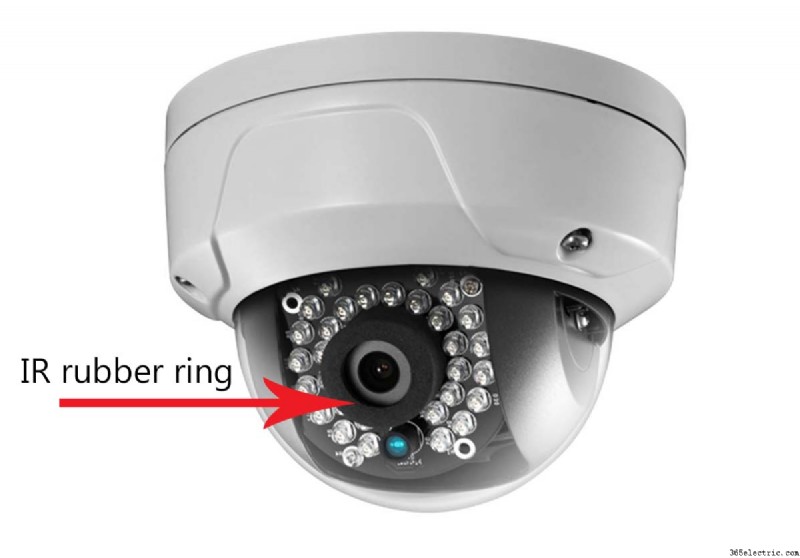 Inspect the camera, and ensure that the rubber is tightly pressed against the glass (not loose). It has to be so “tight” that the same rubber ring may get a bit deformed when hitting the glass cover (which is a good thing).
2. Dirty dome/glass cover
It may happen that the security camera has collected dust, grease, or even fingerprints on the glass. In this case, the IR lights will bounce back on that dirty surface and hit the camera’s lens creating the blurry/foggy effect.
Inspect the cover glass closely and wipe any dirt or dust located there. Quite often the cameras are installed in dusty environments which means they will get dirty pretty quickly.
Additionally, it’s recommended to clean your cameras once in a while, not wait until you can’t see anything on the footage.
At the same time, check the glass cover for any scratches. If there are scratches, then the IR light may bounce back and blind the lens. If you see scratches, try to smooth them slowly with some paper ground. Or you can replace the glass cover altogether which is the recommended way.
3. Reflection from a solid object close to the camera
If there’s a solid surface close to the camera, the IR lights may hit the object and bounce back to the camera. Technically, that’s how the camera is supposed to detect the light when it’s dark, however, if an object is way too close to the camera, the picture may get affected by the reflection.
These reflective objects can be metal surfaces, doors, fences, walls, etc. Inspect the camera’s placement and check if there are such objects close to the camera that may cause the blurry/foggy issue.
Additional recommendations:avoid leaving plants in front of the camera, especially plants with big leaves. Also, don’t place the security camera in tight corners because the walls will be too close and the IR lights will get reflected.
If you tried all these tips and the CCTV image is still blurry or foggy, try to install the camera on a different spot and see if the picture gets better.
The lens is unfocused
If the camera’s image is blurry or foggy during the nighttime and daytime then the problem can be the focus.
Each camera’s lens needs to focus the light on the right spot on the camera’s image sensor. If unfocused, the picture will look blurry or foggy (day and night time).
 Security cameras use different types of lenses, some of them are fixed, and some are varifocal. Either way, the principle of how they function is the same:the light comes through the lens and must be collected/directed at the right spot in the camera’s image sensor.
1. Security camera with varifocal lens
A varifocal lens is a customized lens that can be adjusted to various lens sizes. For example, many varifocal cameras are 2.8mm to 12mm which means you can adjust the camera and go from a white angle lens (2.8mm) to a more narrow one (12mm), or somewhere in between.
If your camera is blurry, you need to adjust the varifocal lens by turning the screws left and right until you get a sharp image.
Basically, by adjusting the focus or the zoom you can make the image clear and sharp. The image below shows a typical varifocal lens with its focus and zoom controls.
 The recommended way to adjust the camera is to look at the live images and simply turn the controls on the camera left until you’re happy with the distance (zoom) and clarity (focus) of the picture.
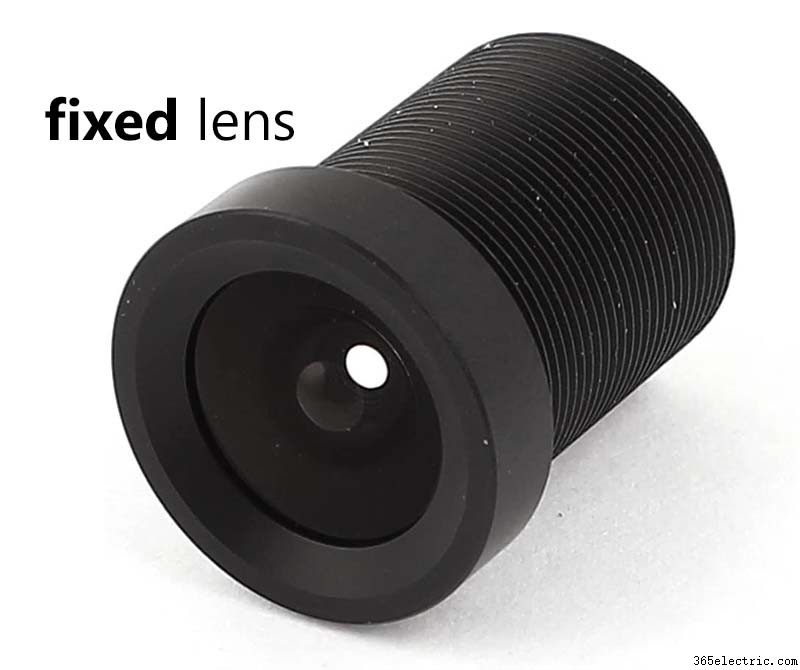
2. Security camera with fixed lens
As the name suggests, on this type of security camera the lens is fixed which means you can’t rotate it until you get the right focus.
This type of camera is already adjusted to the right distance and focus once they come out of the factory line. For example, a 3.6 mm fixed lens camera is adjusted to 3.6mm and you’re not “allowed” to adjust anything.
However, even though the camera is supposed to be adjusted the picture may still look out of focus (blurry/foggy). This happens because the camera somehow is not adjusted perfectly in the first place or the image sensor is incorrect.
Obviously, there’s a way to adjust the lens yourself. Open up the camera and using your hands or pliers, rotate the lens clockwise until the image is clear and sharp. Go slowly and carefully, usually, a little bit of turn will focus the camera.
An example of the fixed lens is shown in the picture above. Note the threads, by twisting the lens a little bit you may fix the blurry picture on the screen.
Bad lens
In some cases, the camera’s lens is simply bad. You can try all the tricks in the book and still not fix the blurry/foggy issue. Many low-cost cameras come with cheap lenses that don’t function the way they’re supposed to. We always recommend going for established CCTV manufacturers .
Additionally, many cameras have the so-called IR filet issue. This is a filter that goes between the lens and the image sensor.
When the light passes through the lens, it hits this filer and then hits the image sensor. However, in some cases, the IR filter is damaged or low quality and doesn’t filter the light properly causing the blurry/foggy issue on the image.
If you have stumbled upon a camera with a bad lens, you can either return the product or ask the manufacturer to warranty it. In most cases, you have to return it. It’s very default to fix a damaged lens’ IR filter.
Factory reset the camera
On rare occasions, the issue may be sort of software-related. Maybe a bug in the software or simply the settings on the camera are messed up. If you have tried all the steps, the last tip is to try to factory reset the camera.
If you’re using an HD analog camera, you can factory reset via the camera’s interface. Play with the toggle on the pigtail and find the “Reset” option. Once reset, the camera will blink and come back online after 5-10 seconds.
If you’re using IP cameras, you can factory reset by using the reset button on the camera itself. Usually, it’s located in the camera’s motherboard, find it and keep it pressed for 10-15 seconds while the camera is powered on. Wait and the camera will come back online, check if the image is clear.
Zaključak
In this article, we discussed ways and tricks to fix a security camera that shows a blurry or foggy image. Make sure the camera is focused and zoomed properly, ensure that the rubber ring is located in the camera and there’s no solid surface close to the camera.
Also, always go for CCTV security cameras that have good reviews and feedback from their users.