Top 30 savjeta za jesensku fotografiju:Osnovni savjeti za snimanje

Od predviđanja jesenske boje do eksperimentiranja s ICM-om, izlaganja kostura i traženja zlata, Tracy Calder ima 30 savjeta za izvanrednu jesensku fotografiju
Top 30 savjeta za jesensku fotografiju
1. Pronađite red u kaosu
Kad snimate šumu, može biti teško pronaći vizualni smisao u kaosu koji vas okružuje. Kako biste pojednostavili scenu, potražite skupine stabala koja su lijepo odvojena, i preko okvira i od naprijed prema natrag. Gdje je moguće, izbjegavajte snimanje iz kutova koji dopuštaju preklapanje debala i odaberite jedno stablo 'heroj' oko kojeg se vrti ostatak kompozicije. Također može biti korisno tražiti oblike, linije i uzorke koji se ponavljaju.
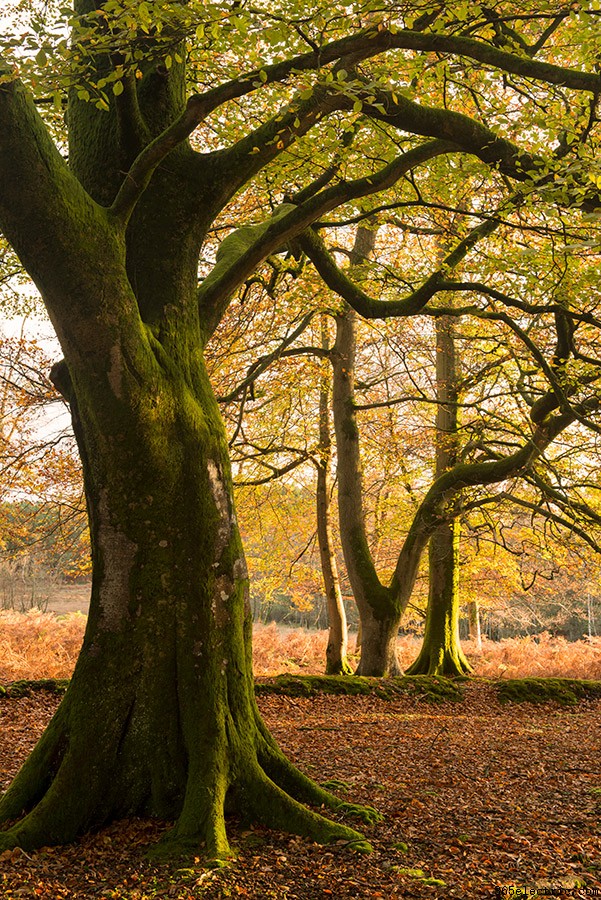
Slika:Ross Hoddinott
2. Nemojte se sramiti
Neke vrste drveća pokazuju ponašanje poznato kao 'sramežljivost krošnje' gdje se vrhovi ne dodiruju, stvarajući fotogenične praznine u krošnjama – to se često događa u stablima iste vrste i primijećeno je u crnim mangrovama, japanskom arišu i nekim vrstama eukalipta. Ako ste dovoljno sretni da svjedočite ovom fenomenu, popnite se na leđa, usmjerite kameru prema nebu i bacite se na posao! Ako niste, još uvijek možete postići upečatljive snimke s baldahinom ležanjem, gledanjem prema gore i radom na sceni dok kompozicija ne bude dobra.
Slika:Tracy Calder
3. Eksperimentirajte s orijentacijom
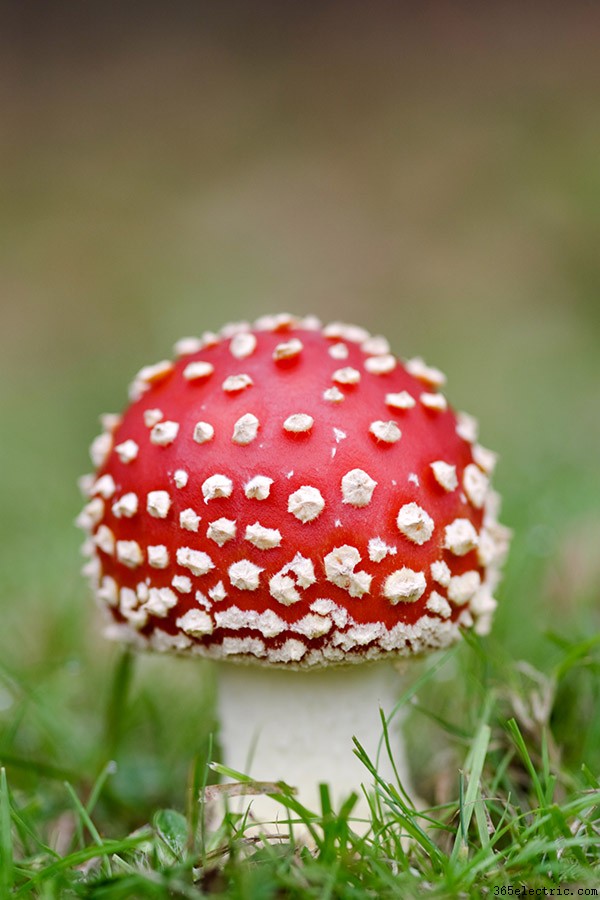
S vremenom mnogi od nas razviju fotografske navike – neke od njih mogu biti korisne i postati dio našeg osobnog stila, dok nas druge mogu spriječiti u eksperimentiranju i napredovanju. Jedna je navika uparivanje određenih subjekata s određenim usmjerenjima kamere:gljive kao vertikale, krajolici kao horizontale itd. Iako to često može uspjeti, važno je ponekad prekinuti s tom navikom i istražiti sve mogućnosti.
Slika:Tracy Calder
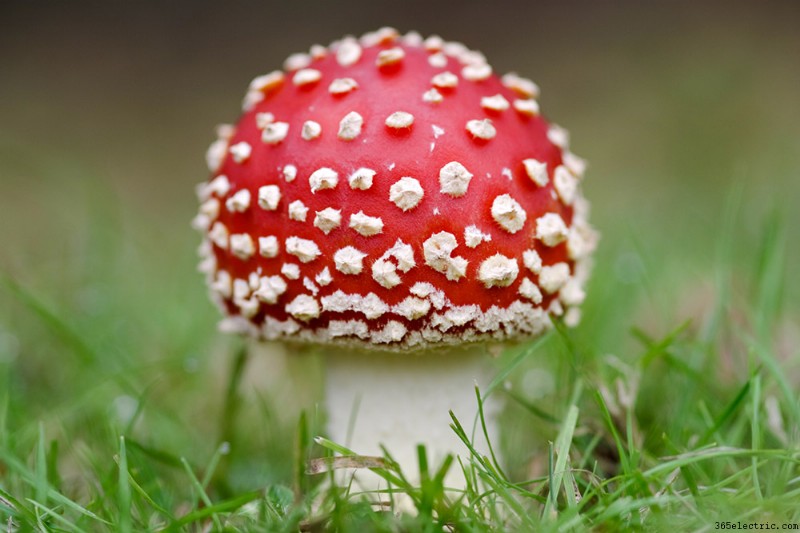
Slika:Tracy Calder
4. Slavite žetvu
Jabuke, kupine, tikve, kruške i ukrasne tikvice su u jesenskoj sezoni, pa iskoristite ovu obilnu berbu na najbolji način okušajući se u fotografiji hrane ili mrtve prirode. Možete posjetiti lokalnu tržnicu, kupiti ono što vam zapne za oko i zatim to snimiti kao mrtvu prirodu ili možete dokumentirati proces pripreme i jela. Ili snimite događaj žetve kao što je dan prešanja jabuka, festival žetve itd.
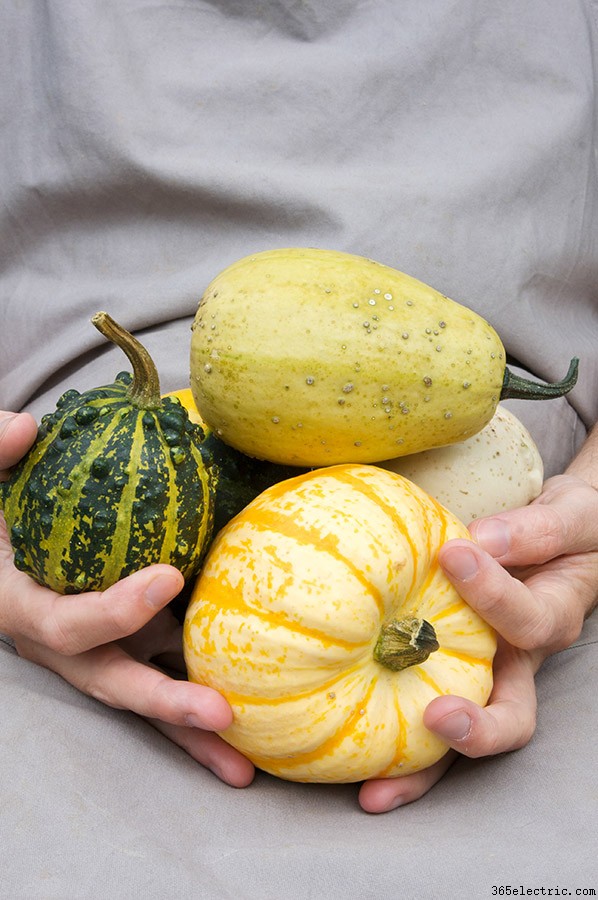
Slika:Tracy Calder
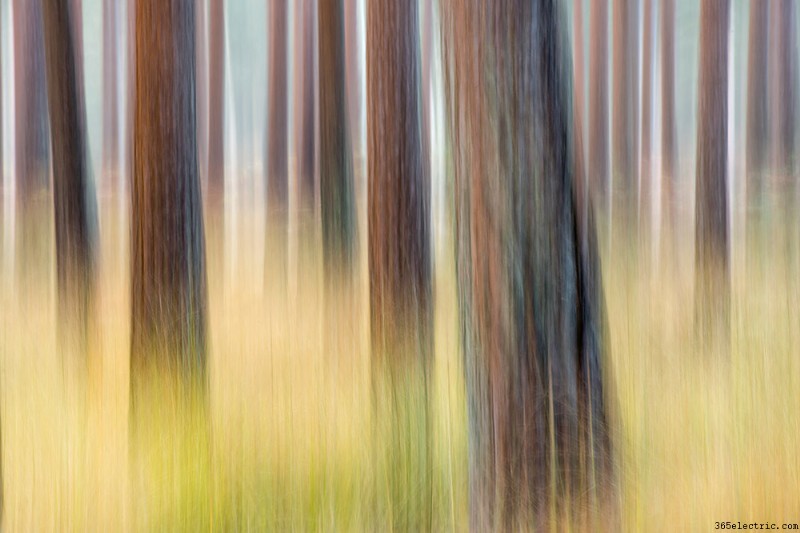
5. Eksperimentirajte s ICM-om
Jesen je odlično vrijeme za eksperimentiranje s ICM-om (Intentional Camera Movement). Pomicanje fotoaparata dok je zatvarač otvoren može rezultirati prekrasnim, impresionističkim slikama koje daju lijep osjećaj lokacije. Pokušajte imati ideju o svojoj umjetničkoj namjeri prije nego što počnete. Kameru možete pomicati na razne načine:možete se pomicati okomito, vodoravno ili dijagonalno, rotirati kameru ili je možda jednostavno pomicati na nepravilan način. Očito, duljina vremena u kojem je zatvarač otvoren imat će izravan utjecaj na rezultat, pa možda započnite od 1/2 sekunde i krenite od tamo. (Ako snimate pri jakom dnevnom svjetlu, možda ćete morati upotrijebiti ND filtar kako biste forsirali manju brzinu zatvarača.)
Slika:Ross Hoddinott
6. Ispričajte priču
Većina nas je upoznata sa slikama divljih životinja koje pričaju priču – vjeverice koje skupljaju orahe i zakopavaju svoj plijen pod zemlju ili čvorci koji stvaraju zapanjujuće prikaze iznad napuštenih zgrada – ali ako pogledate dovoljno pažljivo, biljke, gljive i drugi statičniji subjekti također imaju priče reći. Na primjer, velika biljka nagnuta prema manjoj može izgledati kao roditelj koji štiti dijete. Potražite te priče i upotrijebite dobru tehniku da ih nacrtate.
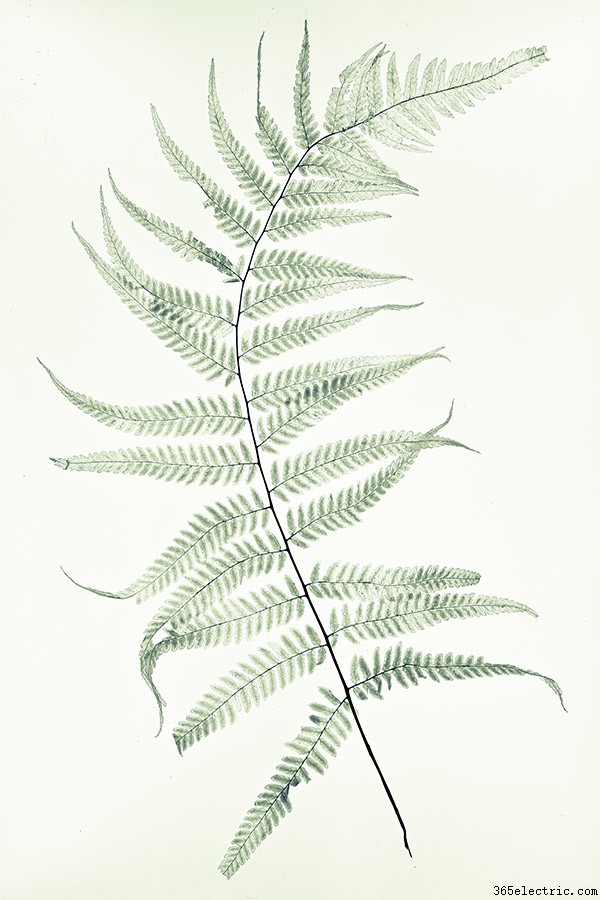
7. Potražite kosture
Skeletno lišće može biti izvrstan subjekt za fotografiranje u zatvorenom prostoru kada je loše vrijeme. Možda ćete ih odlučiti snimati na svjetlosnoj podlozi (mala craft verzija će obaviti posao). Može biti teško pronaći savršeno očuvani kostur lista u divljini, stoga razmislite o tome da ga 'napravite' kod kuće - na YouTubeu postoje videozapisi koji vas vode kroz proces. Također možete pokušati osvijetliti druge biljke fotogeničnim strukturama.
Slika:Tracy Calder
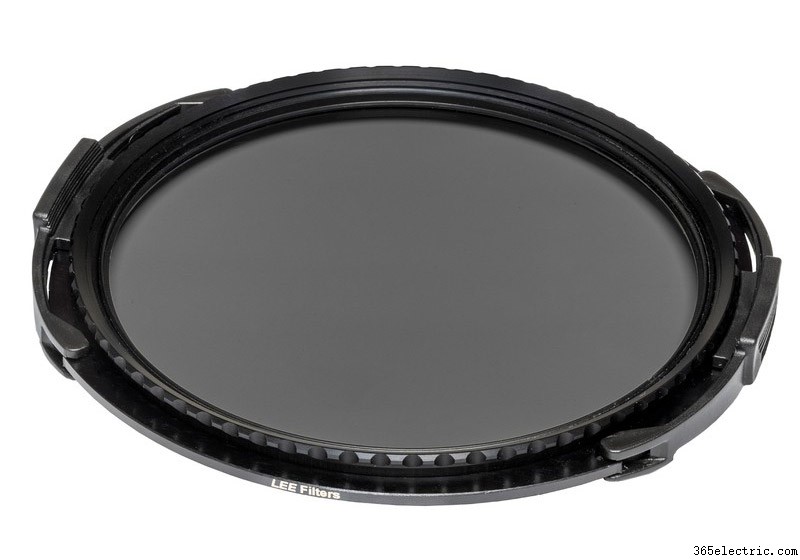
8. Polarizator
Korištenje polarizatora pri snimanju jesenskog lišća može smanjiti odsjaj na lišću, intenzivirati prirodne boje i prorezati izmaglicu. Jednostavno okrećite ovaj filter dok se ne postigne željena količina polarizacije.
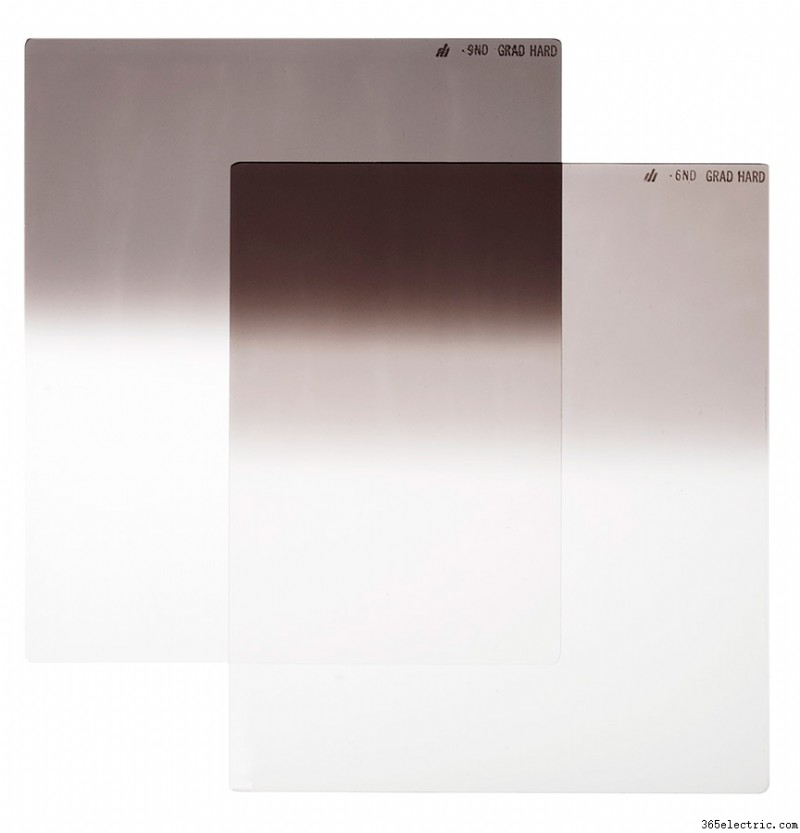
9. Filter neutralne gustoće
ND filtri smanjuju količinu svjetlosti koja dopire do senzora vašeg fotoaparata, omogućujući sporije brzine zatvarača – ovo je idealno za ICM fotografije ili kada želite smanjiti vodu do blagog zamućenja.
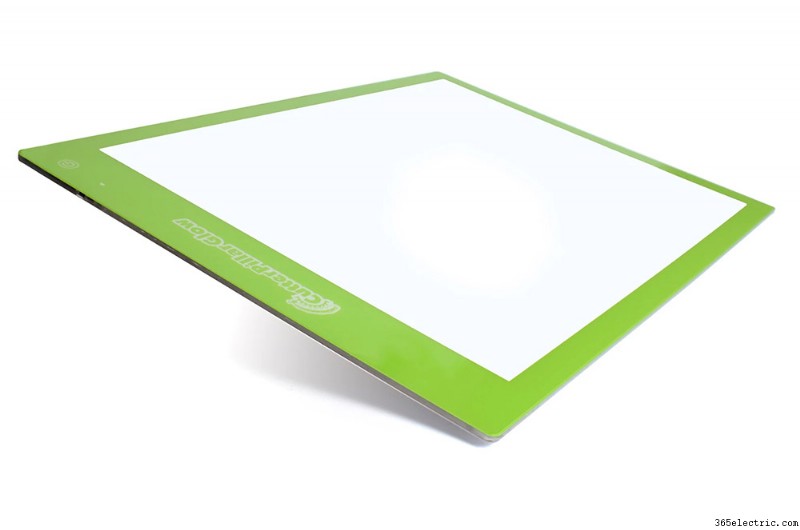
10. Svjetlosna podloga
Kada je vrijeme previše mračno da biste izašli vani, pokušajte snimati prozirne objekte na svjetlosnoj podlozi. Koristim crafters ploču poznatu kao CutterPillar Glow, koja ima tri različite razine LED svjetla.
11. Provjerite ima li mrlja
Ako snimate krupni plan jesenskog lišća, provjerite jesu li primjerci koje odaberete savršeni. Pregledajte ima li na njima poderotina ili mrlja - ono što golim okom izgleda kao sićušna oznaka na konačnoj će se slici činiti uvećano i jako zbunjujuće. Slično tome, provjerite rubove okvira za elemente koji odvlače pažnju od vašeg subjekta - vlati trave, grančice i boje koje vam odvlače pažnju mogu proći nezapaženo kada se koncentrirate na glavni subjekt.
Slika:Tracy Calder
12. Potražite prirodne okvire
S drvećem svedenim na jednostavne, kosturne oblike, debla, grane i grane mogu postati izvrsna prirodna sredstva za uokvirivanje. Bilo da snimate vodopad, krajolik ili građevinu koju je napravio čovjek, poput skulpture, uređaji za kadriranje mogu uvući pogled gledatelja u sliku i stvoriti veći osjećaj dubine. When you’re using this compositional tool, it’s important to make sure that the framing device has a natural connection to the main subject and does not distract from it.
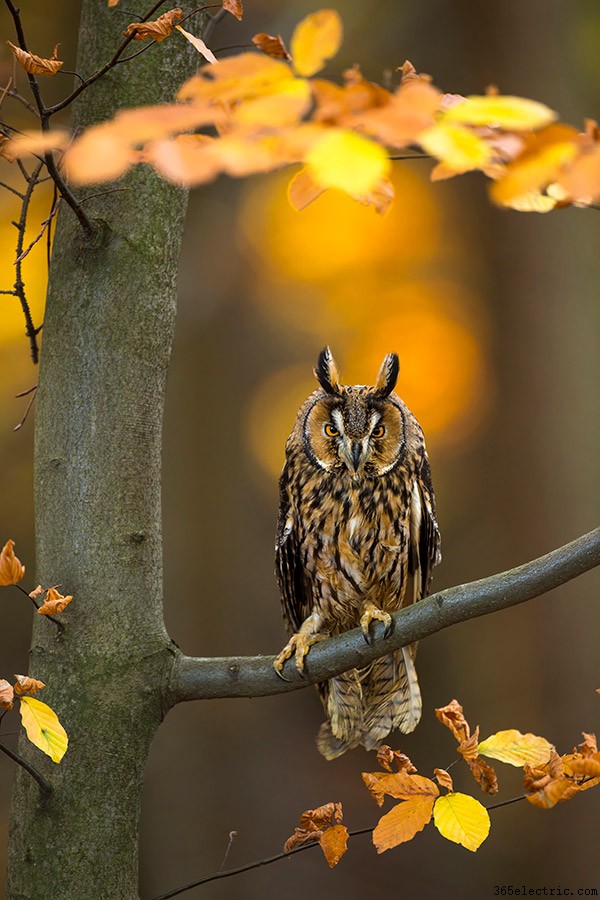
Image:Ben Hall
13. Ease the burden
Obtaining a worm’s-eye view of plants and detritus can be uncomfortable, but you can ease this by using a foldable sitting mat and/or waterproof trousers. Just as wildlife shots gain greater impact when you get down to an animal’s eye level, it’s a good idea to imagine plants and fungi have eyes and do the same! For shots like this I like to use a beanbag, although I’ve also taken a child’s swimming armband to seriously boggy places.
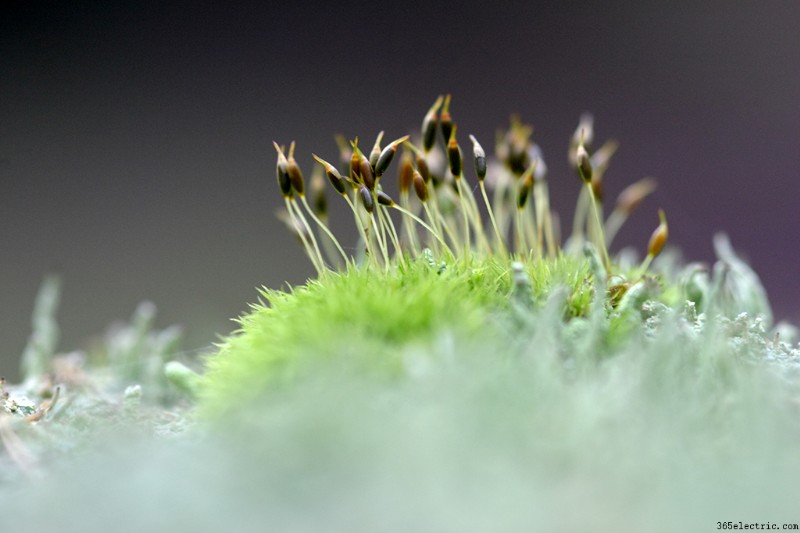
Image:Tracy Calder
14. Try a portrait
We’ve all seen pictures of children throwing autumn leaves into the air and watching them fall to the ground like confetti. We’ve also seen pictures of couples walking down wide, tree-lined paths huddled together against the chilly air. These might be photographic cliches, but with some pre-planning there are plenty of opportunities to create unique portraits that make the most of this season’s attributes.
You could try shooting contre-jour (into the light), for example, or maybe take advantage of directional shafts of light as they fire between gaps in the trees. In addition, use colour theory to plan outfits and props – orange and green are considered complementary colours, for example, so maybe pair a green jumper with orange leaves.
15. Watch the weather
Overcast days are great for autumn photography because cloud cover reduces contrast and makes leaf colours appear rich and saturated. The absence of direct light on foliage also reduces glare. (Remember to exclude the sky where possible as this tends to be white and featureless on overcast days.)
When the wind speed rises above 10mph, leaves and flowers leap about, which makes macro photography quite a challenge, so unless you want to intentionally include blur in your photographs, check the forecast first. (You’ll also want to pay close attention to the weather if you’re hoping for fog or mist on a morning shoot.)
Whether you’re hoping to shoot in mist, overcast light, low wind or raking light, a good weather app is invaluable. Try AccuWeather, which features up-to-the-minute reports.

Image:Tracy Calder
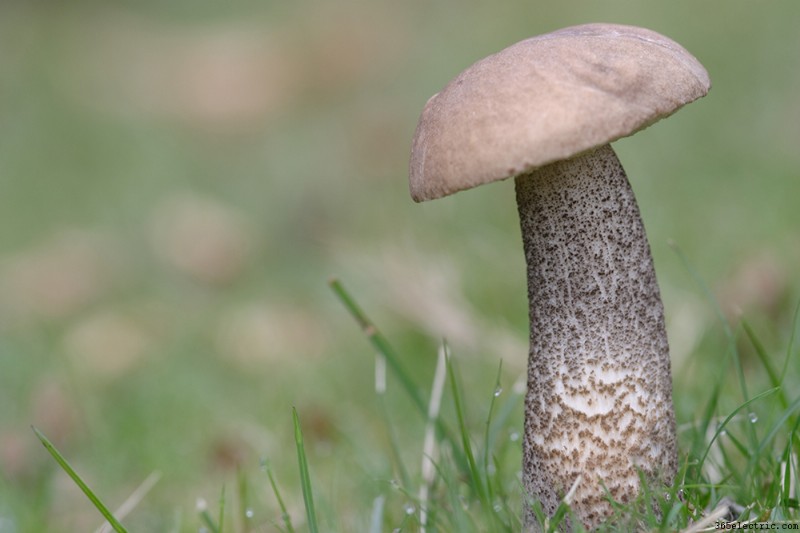
16. Do your research
Being able to identify what you’re photographing has several advantages:firstly, it helps you to find similar subjects and species in the future – fly agaric toadstools often thrive under birch trees, for example, which narrows things down – secondly, it helps you to label and caption your images, and thirdly the more you know about a subject the more it will inform the way that you photograph it. There are plenty of printed guides out there, but online apps can be particularly helpful for identifying subjects in the field.
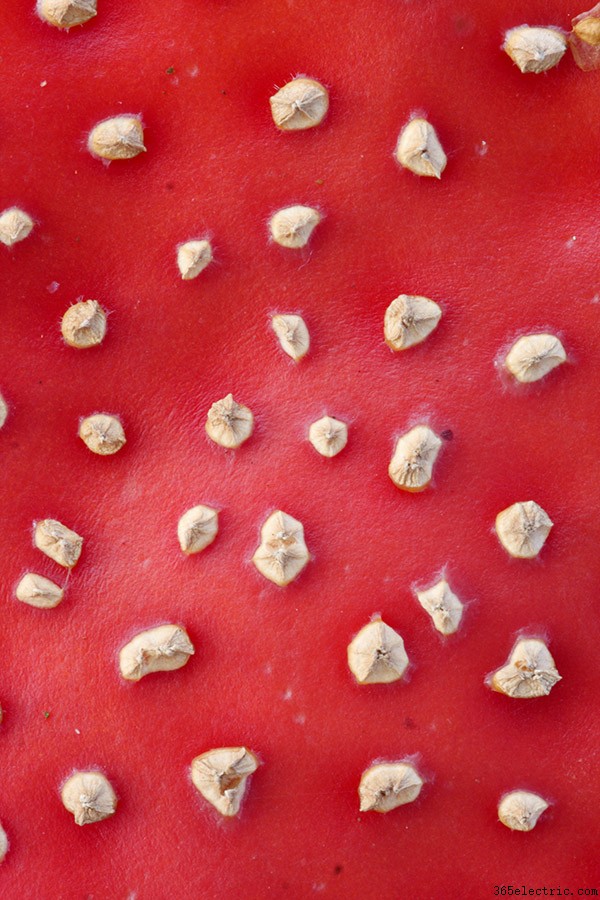
Image:Tracy Calder
17. Emphasise texture
Peeling bark, weathered wood and the spiky cases of horse chestnut seeds make for wonderful autumnal subjects, but to emphasise their texture and form you need the right kind of lighting. Strong, directional light is preferable, so plan your shoot for early or late in the day when the position of the sun will result in strong side lighting.
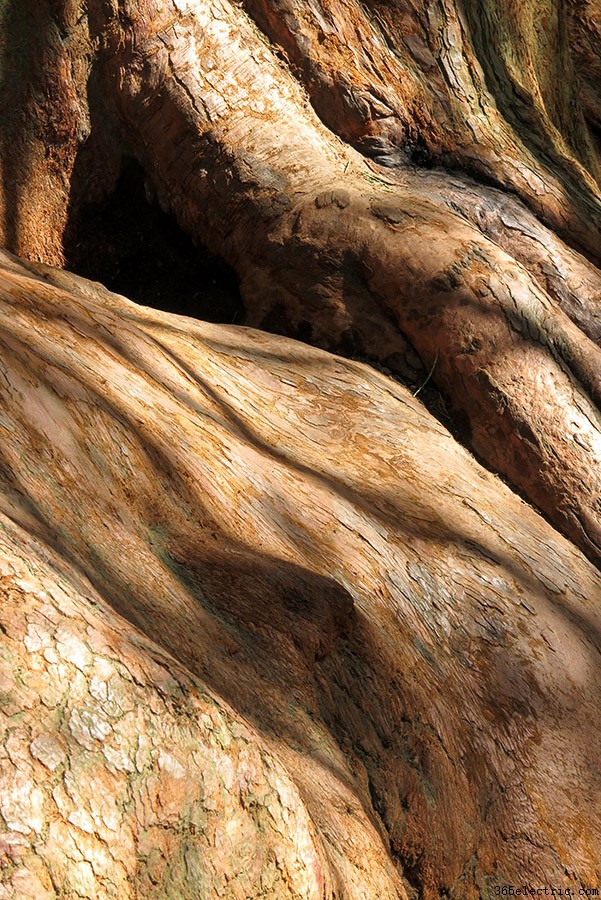
Image:Tracy Calder
18. Beanbag
When you’re shooting subjects close to the ground, a beanbag can provide great support. Bags can be purchased filled or unfilled, with lining or without – try Wildlife Watching Supplies.
19. Artist’s colour wheel
An artist’s colour wheel can help you to plan outfits and props for an autumn portrait shoot. Orange and green work well together, as do blue and yellow.

20. Revisit old venues
You may have shot a certain landscape hundreds of times, but the chances are that if you haven’t photographed it in autumn then you’ve probably been missing out.
21. Search for wildlife
While many birds fly south during autumn, whooper swans and many varieties of duck, geese and wading birds spend the autumn/winter in the UK. It’s relatively easy to get frame-filling shots of swans at wetland centres such as Slimbridge where birds are given food at set times. When it comes to mammals, red deer are a firm favourite. You might decide to capture a deer silhouette in the evening when the sun is low in the sky, or perhaps a cloud of breath leaving a stag’s mouth on a chilly morning. (The British Deer Society has published an excellent Code of Conduct on its website with advice including using a lens with a focal length of 300mm or more – www.bds.org.uk.)
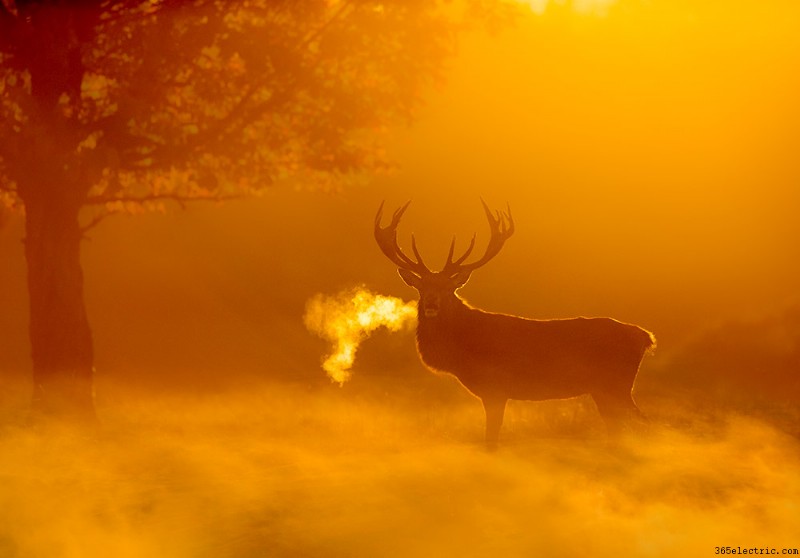
Image:Ben Hall
22. Think in multiples
Many DSLRs now have an in-camera multiple exposure function. As a result, combining two or more exposures in one image has never been easier. You can usually combine a ‘live’ image with one already stored on your memory card, which results in plenty of opportunities for getting creative. Autumn is a great time to experiment with this technique because you can combine colourful abstracts with shots of more structural subjects such as skeletal trees.
23. Introduce movement
Reducing running water to a silvery blur, while surrounding foliage remains sharp and full of colour, is a nice way to introduce contrast and order to otherwise chaotic autumn scenes. In order to do this, you might need an ND filter to force a slow shutter speed. (If you are shooting on a dull day or at dawn or dusk you might not need the filter). Mount your camera on a tripod and start with one second or longer. You could also try a similar thing with leaves moving in the breeze and a static element such as a tree trunk or rock to create contrast.
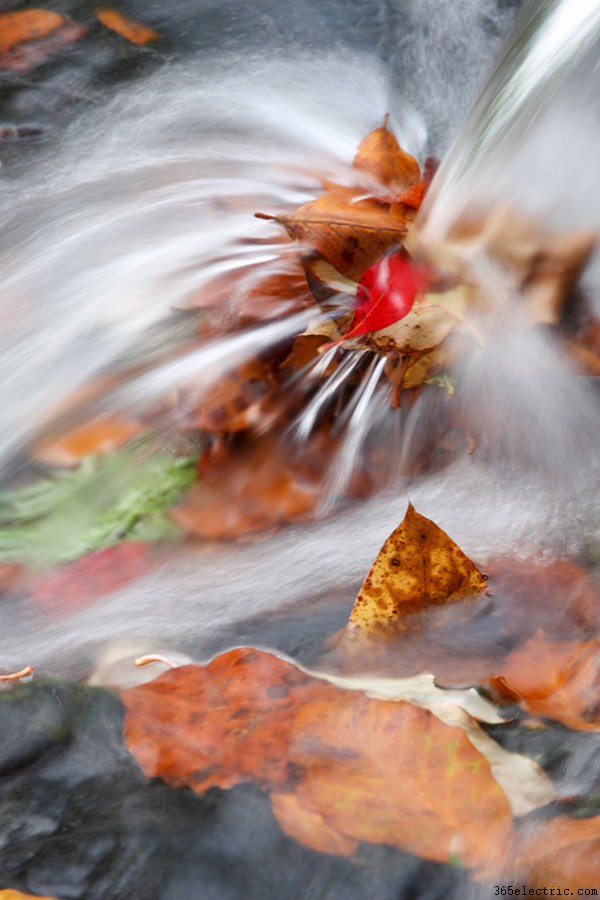
Image:Tracy Calder
24. Mist opportunities
At this time of the year, warm water in the air cools rapidly, causing it to change from gas to tiny visible droplets, in other words, mist. These conditions don’t last long, so you will need to check the weather forecast the night before and head out before the sun rises and it burns off. Scenes dominated by mist often contain a lot of highlights, so consider adding a stop or two of exposure compensation to stop the camera from being fooled into under-exposing the scene. Look out for layers, bold shapes and objects which reveal clear outlines.
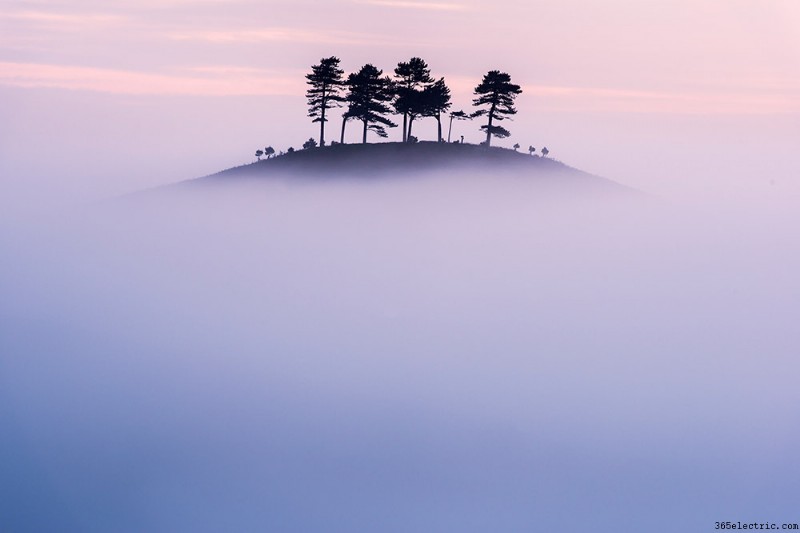
Image:Ross Hoddinott
25. Get reflective
With leaf colour ranging from fiery reds to golden yellows and intense oranges, autumn is the perfect time to shoot painterly reflections in rivers, lakes, ponds and puddles. Autumn colour is triggered by changes in day length and night temperature, so the beginning of this spectacle can vary from year to year. There are groups on Facebook that share up-to-date information on leaf colour and conditions in specific areas so check before you travel.
26. Search for gold
Natural light just after sunrise and before sunset is ideal for autumn shots. During this ‘golden hour’ the light is warmer (as measured on the Kelvin colour temperature spectrum) with plenty of yellows, oranges and reds. It’s a great time for shooting landscapes and bringing out the rich spectrum of colours that we often encounter at this time of the year. To ascertain exactly when the golden hour will occur you can use an app such as The Photographer’s Ephemeris or Helios Magic Hour Calculator.
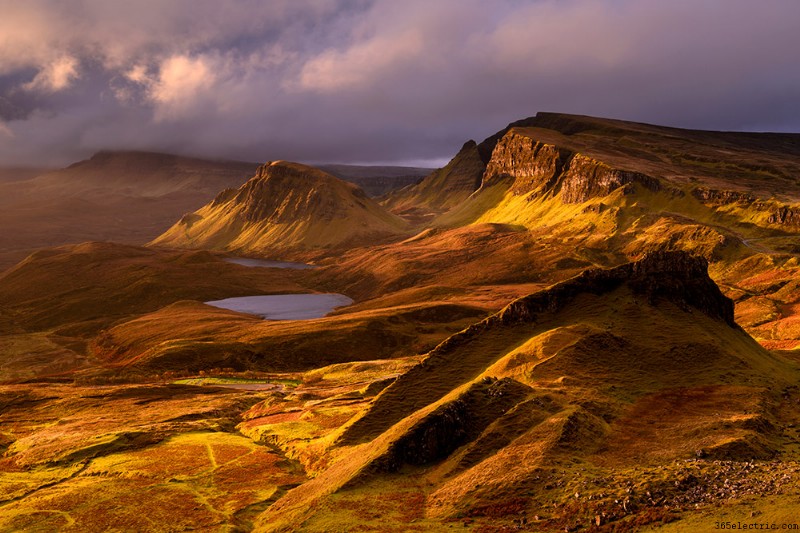
Image:Ross Hoddinott
27. Arrange a flat lay
Shooting objects directly from above can lead to refreshing images that tell the story of a location or season. Chefs say, ‘What grows together, goes together’ and it’s something that can be applied to this type of photography too. If you find some attractive berries, for example, look around to see what else is growing nearby. Are there leaves or brambles that might look good in the composition? When it comes to arranging your treasures, imagine that you are completing a jigsaw – choose a ‘hero’ object and place it in the middle then work on the corners and edges before filling in the gaps with pieces of secondary importance.
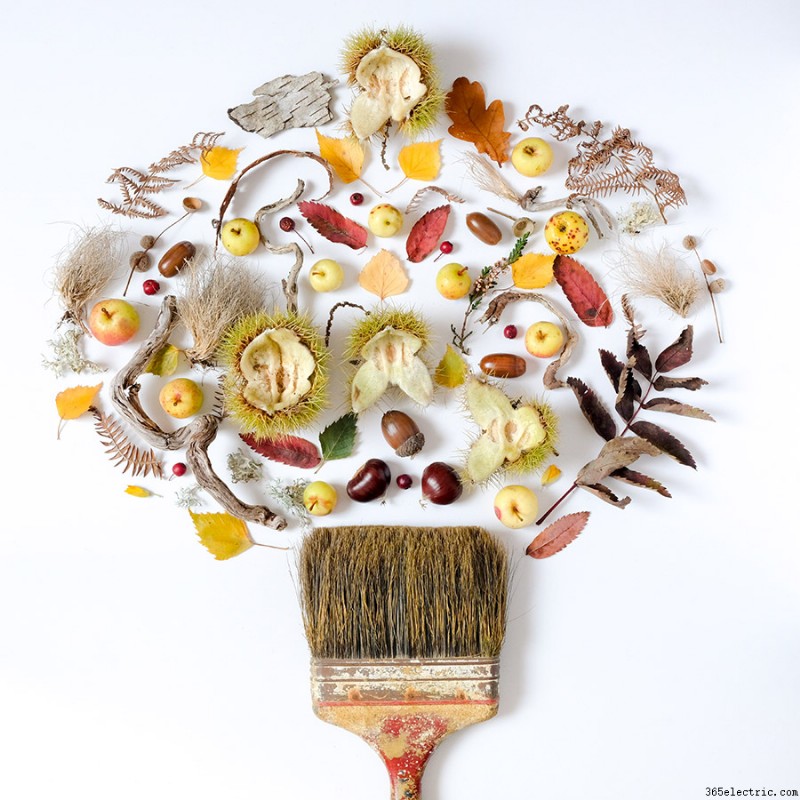
Image:Tracy Calder
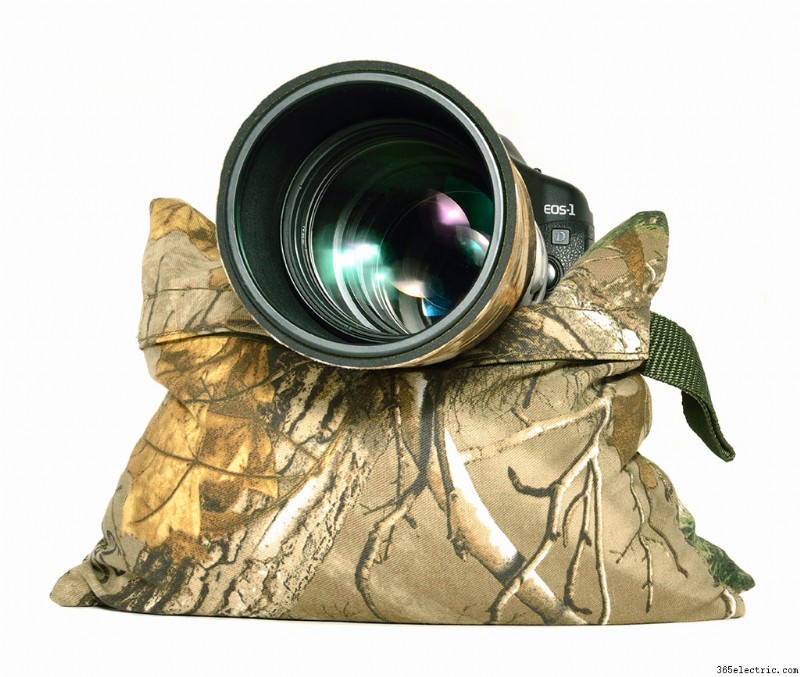
28. Telephoto lens
The British Deer Society recommends using a lens with a focal length of 300mm or more for photographing deer. The Canon EF 100-400mm f/4.5-5.6L II USM lens would be ideal.
29. Multiple exposure mode
The Canon EOS R5 has an impressive in-camera multiple exposure function. With this setting you can automatically combine between two and nine different exposures in one image.
30. Get shooting early
Once the autumn colours set in, be sure to capture them quickly. All it takes is one big storm for them to blow off the trees and the opportunity to pass.
Autumn Photography – Essential Gear
 Warm clothes
Standing around in the wilderness while the sun is low in the sky can be chilly work, so make sure you wrap up warm. Particularly as you are likely to be standing still for a long period of time to get that perfect autumn photography snap.
Build up the layers and include waterproofs for when the skies invariably open.
 Wellies
Getting the right angle for your composition can often require standing on ground that is less firm, such as a boggy field – or even in the middle of a stream.
By donning a pair of wellies you can ensure your feet stay warm and dry, no matter where you venture on your autumn photography adventures.
Gloves
If you’re taking pictures your hands are constantly exposed to the elements – instead of nicely tucked away in your pockets – so can very quickly get cold. You need a pair that will still allow you to operate your camera while keeping you warm.
 Consider fingerless pairs or thinner thermal types – some manufacturers, such as Lowepro, even produce specialist photo gloves for this purpose.
Torch
As the light fades it can become difficult to find buttons on your camera or even spare cards inside your camera bag, so have a small pocket torch on you. It can also be handy to light the way on your walk back to the car.
 Tripod / monopod
Long shutter speeds are needed to create a large depth of field, and at dusk or dawn especially you’ll need a steady tripod to avoid camera shake. Chances are that the light is going to drop faster than you’d expect, so ensure that you have some camera support for low-light photography. If you’re serious about your autumn shots, make sure you bring the sturdiest tripod you can carry.
Macro lens
Some of the best images taken in autumn feature the tiny details of nature, so don’t be afraid to pack the macro lens. A macro lens will allow you to focus right in on the detail and capture some stunning colour and texture, making it perfect for plant life and the autumn colours. So make sure you keep one in your kit bag.
 Wideangle lens
This is the most useful lens for your autumn shots because it gives you a nice wide view with the option of a vast depth of field. For APS-C cameras a 10-20mm is ideal, while full-frame users might want a 24mm prime.
Filters
Filters allow you to control the tonal range and bring it within a more even range. By using graduated ND filters you can darken a bright sky, or with solid ND, slow a stream of water into a blur.
 Waterproof cover
When the rain does come down you usually have two choices:put your camera away or get it wet, but with an all-weather cover like the Kata E-690, you can keep shooting whatever the weather.
Tracy Calder

Ex AP-staffer Tracy Calder is a photographer and writer who co-founded Close-up Photographer of the Year (CUPOTY) in 2018. Earlier this year she was awarded a Gold medal from the RHS for her Plant Scars series. Her work has been exhibited at The Photographers’ Gallery, the National Portrait Gallery and the Saatchi Gallery. To see more, visit Instagram @tracy_calder_photo and www.cupoty.com
Need more autumn photography tips? Try these:
Get your best ever autumn landscapes
Get great autumn wildlife shots
Our best-ever close up photography tips